Home Up Join MVPA! Flag Code 45th/Thunderbirds A Major Mess Sgt. Mess Pvt. Mess General Mess Mini MB


Home
Up
Mini Time Log
Mini Parts etc

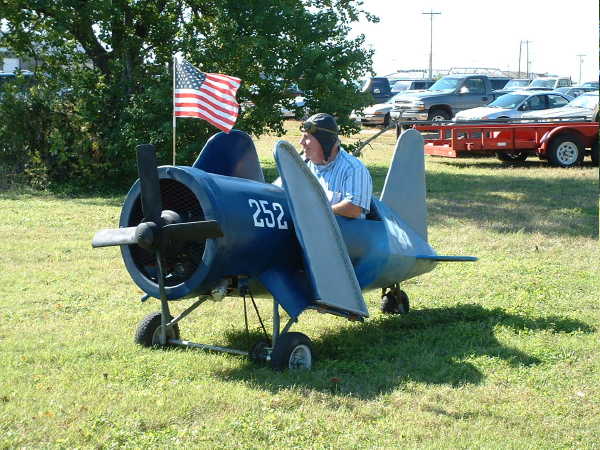
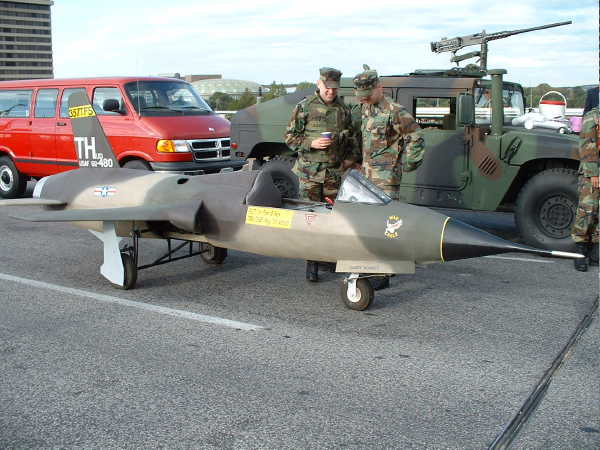
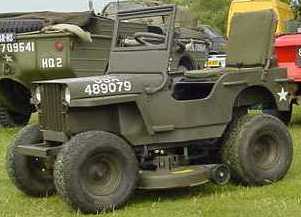
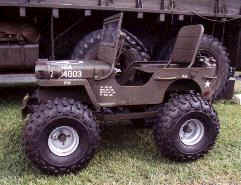
Last Update 05/12/2005 - SOLD!

I know, your asking yourself "Why in the world would anyone purchase a 1/2 scale metal jeep body with no running gear, steering, suspension or drive train"?  Simply - because it's yet another challenge and sounds like a fun little project.  And my dad and I like a good engineering project!  :-)  I had previously seen a couple of other small scale vehicles, primarily aircraft and really wanted to do a military vehicle to take along to the shows and parades.  This seemed like the perfect little project.  Some of the "vehicles" I've seen or located include the following:

To assist in reducing download time, Thumbnail pictures are below - simply click on the picture to see an enlarged version.  To return to this page, use your Browsers BACK button.

F4U Corsair

F105 Thud Bomber Mini-MB (mower) Terrang's MB Tate Ostiguy's MB
F4U_a.JPG (56429 bytes) thud01.JPG (41405 bytes) mower_jeep.jpg (11242 bytes) atv_mini_2.jpg (8101 bytes) TateOstiguyMini.jpg (16572 bytes)
Wings up 1/3 scale 20' long!

Looking for more info... Ani-Car Cuba
mini_pink.jpg (141538 bytes) ani_car1.jpg (49003 bytes) mini_cuba.jpg (47428 bytes)

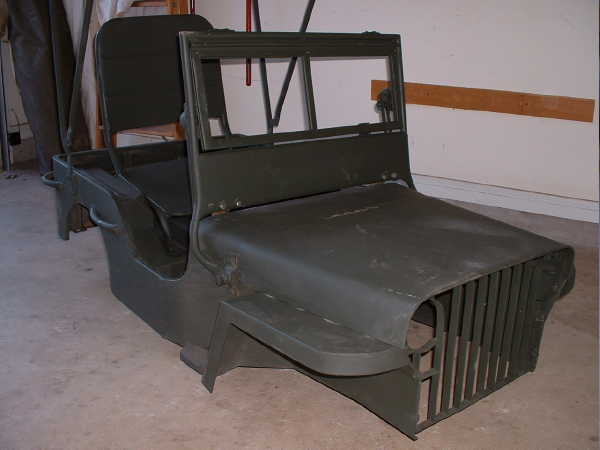
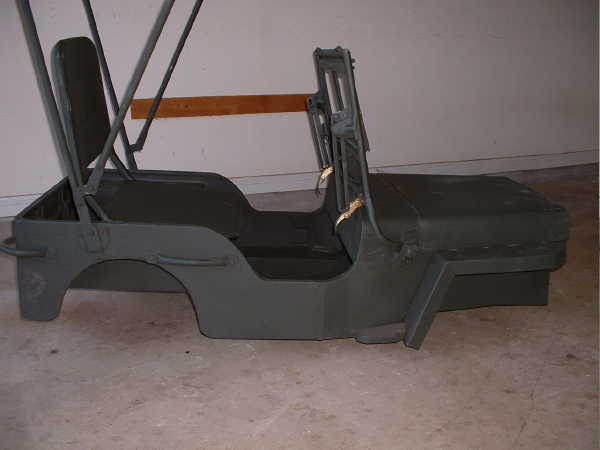
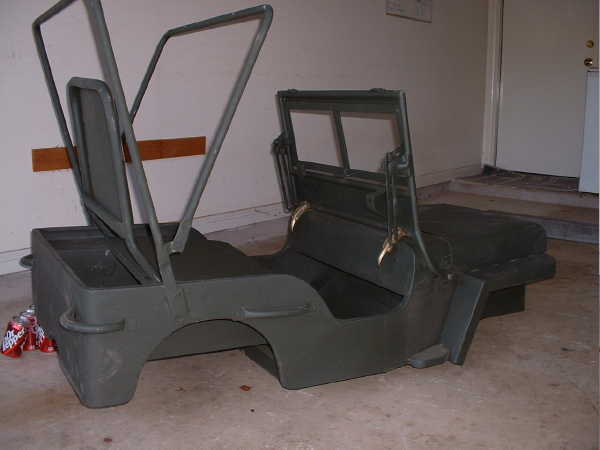
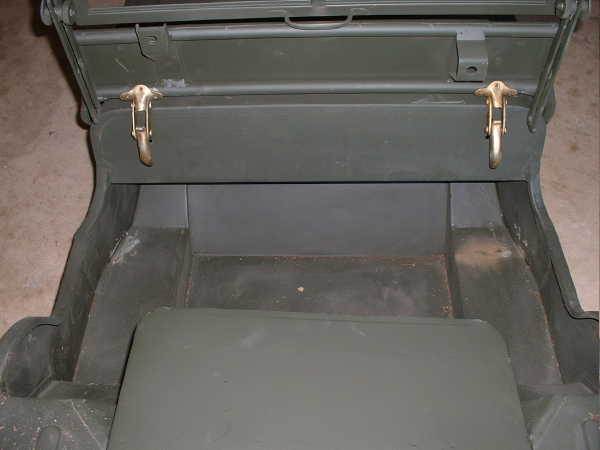
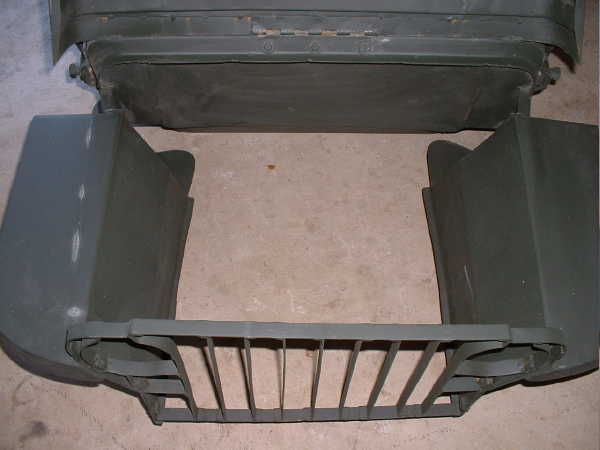
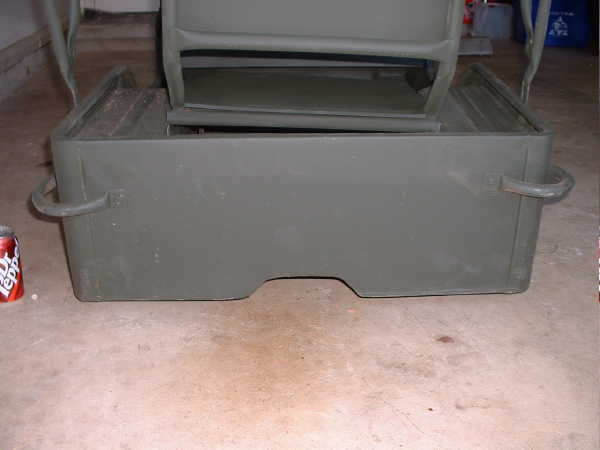
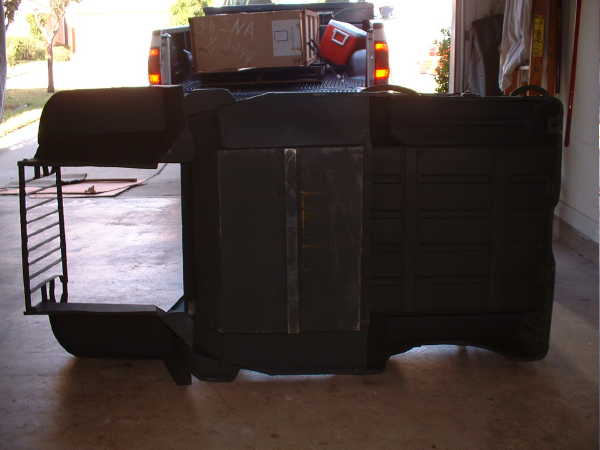
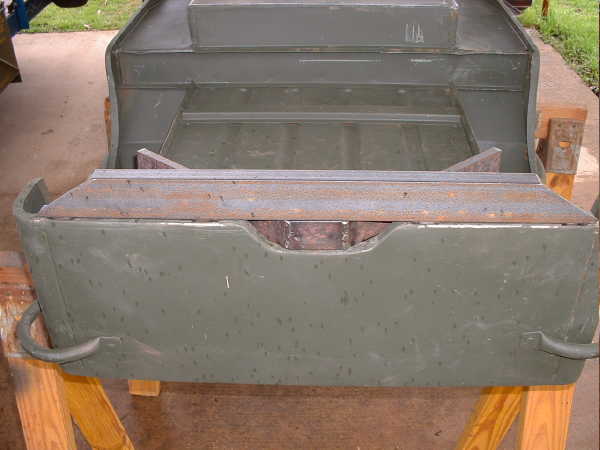
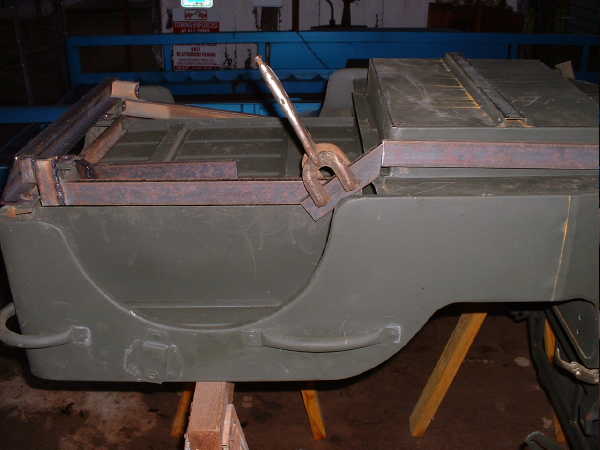
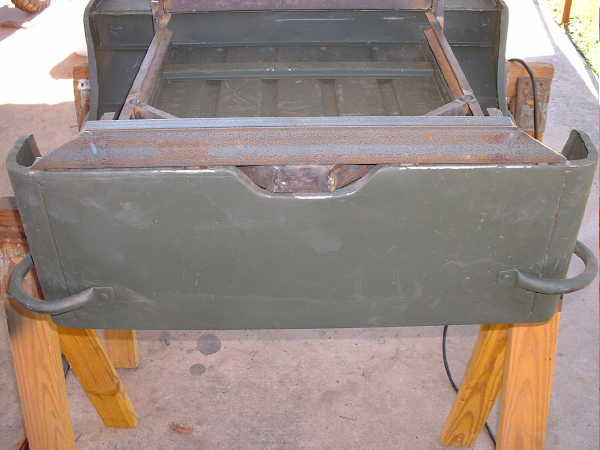
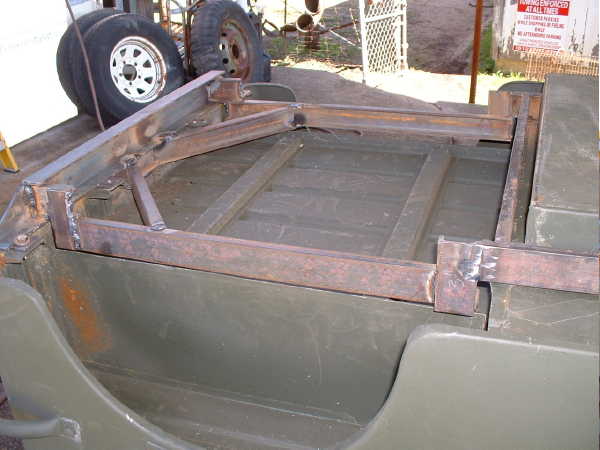
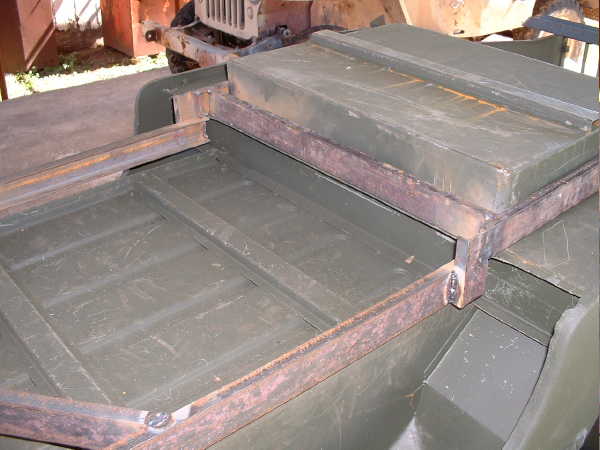
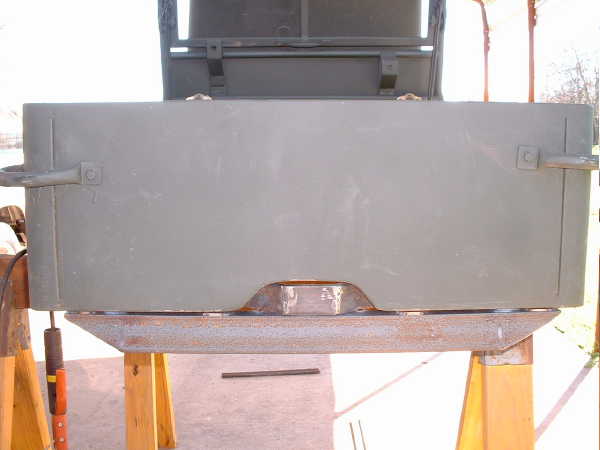
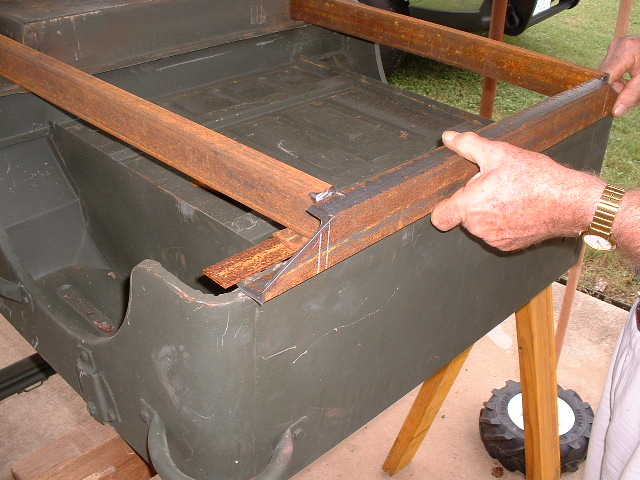
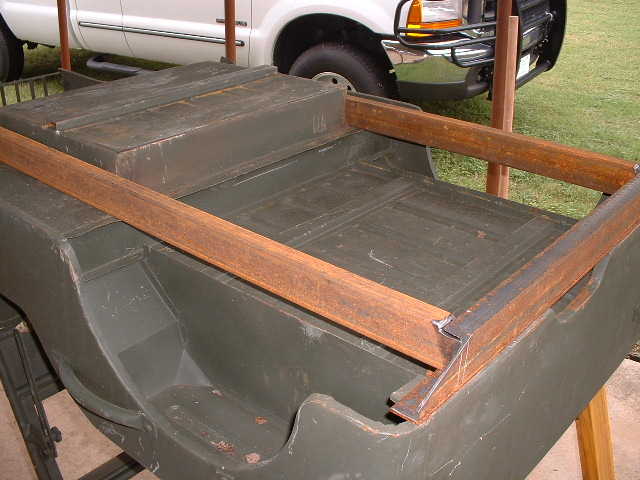
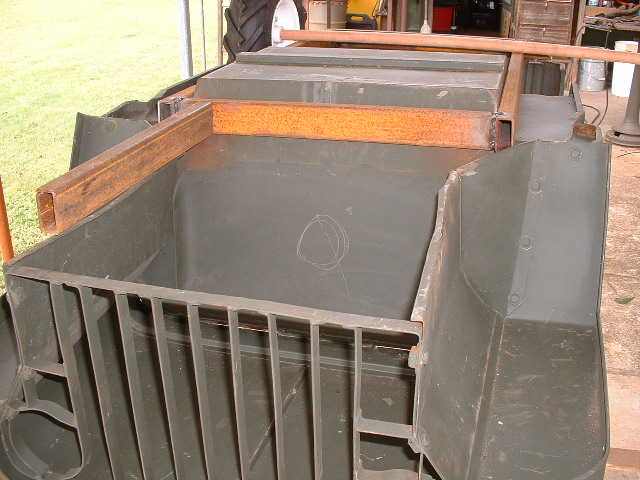
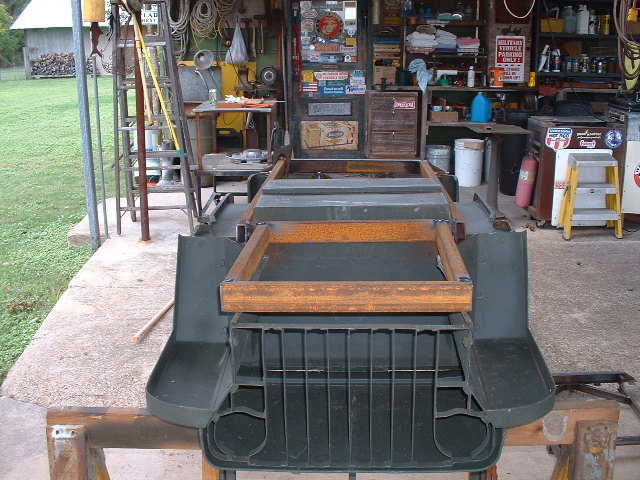
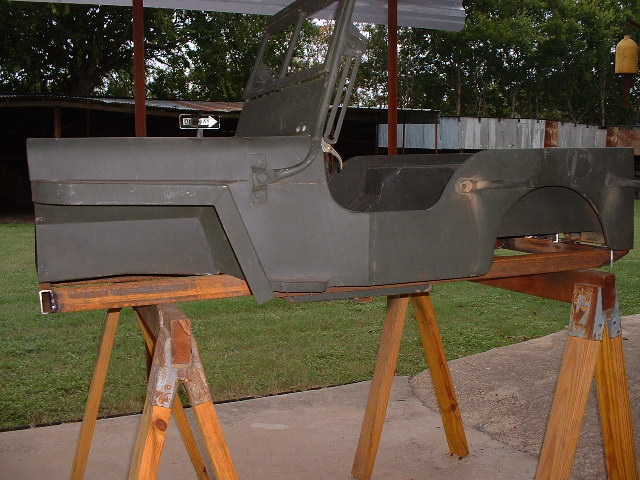
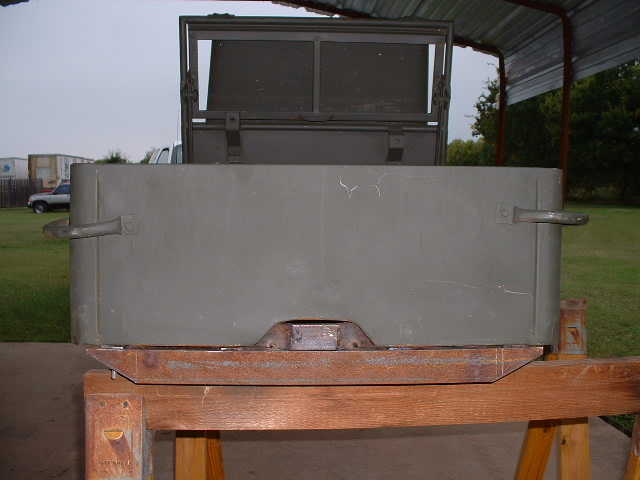
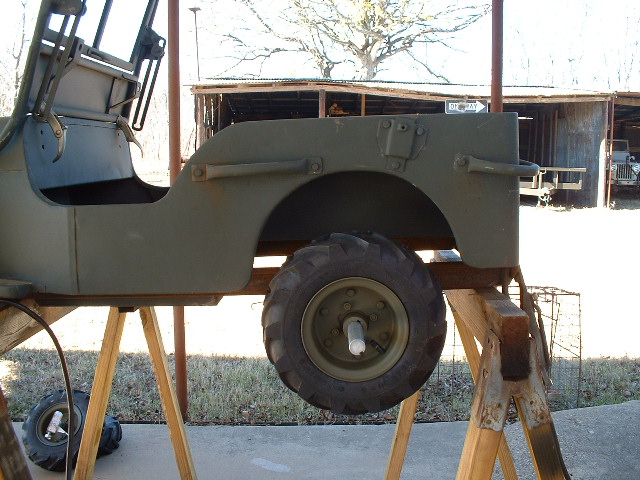
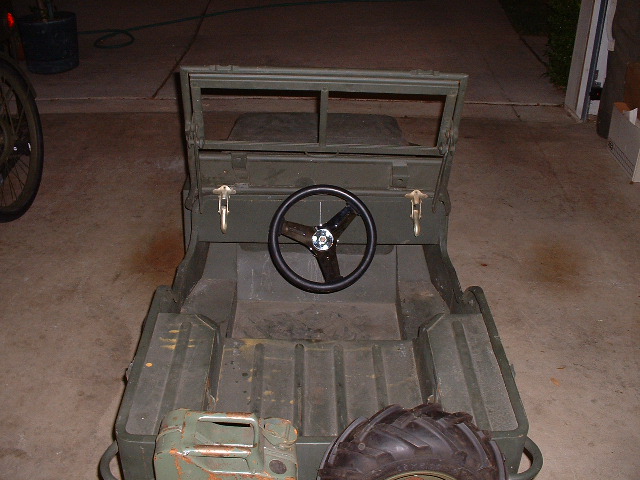
So, with that in mind, I broke down and purchased the Mini-MB, complete with body tub, fenders, grill, hood, windshield frame, top bow and seat.  The metalwork is incredible and the thickness is the same as the reproduction bodies currently manufactured.  The scale is just about 1/2.  Some items are 48% while others are 52% of the original MB.  However, the wheelbase is an even 40" and the front/rear track is 24" or exactly 1/2 of the original.

When the body arrived, I set about to taking pictures to get an idea of what would be required.  The more I looked at it, the more I wanted 
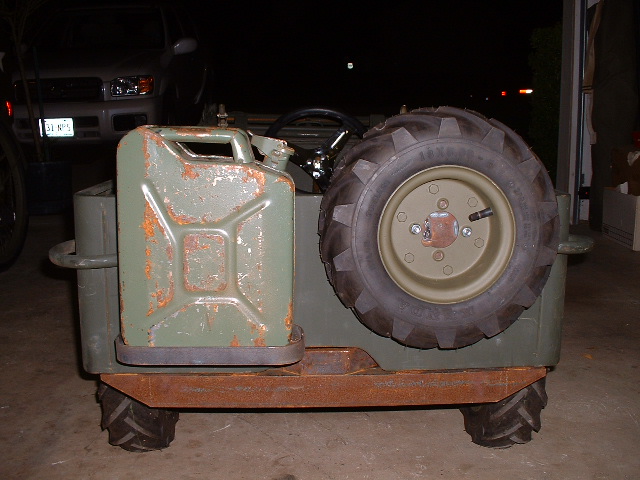
to fabricate all the little parts for it such as shovel, axe, brackets, b/o markers, headlights, bumpers, correct wheels/tires, floating suspension etc.  

mini_02.JPG (31948 bytes) mini_03.JPG (20596 bytes) mini_04.JPG (17859 bytes) mini_05.JPG (19393 bytes) mini_06.JPG (18853 bytes)
Top off the crate Assembled and ready to begin Top bows included
mini_07.JPG (23761 bytes) mini_08.JPG (21886 bytes) mini_09.JPG (26732 bytes) mini_10.JPG (18829 bytes) mini11.JPG (21118 bytes)
It's a "Slat Grill" Area for pintle and rear bumper Bottom

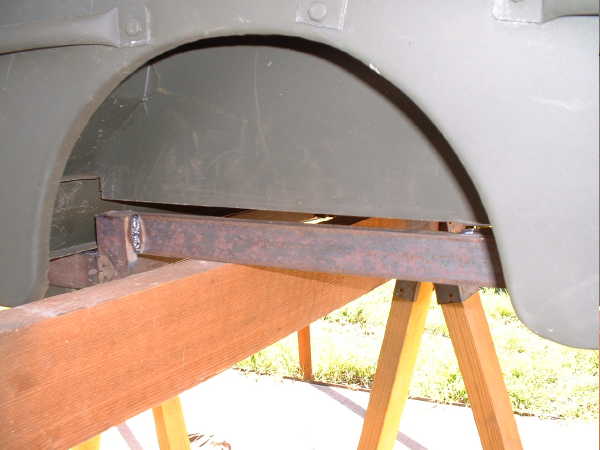
During the initial assessment, it became apparent that the engine/drive train combination would be the difficult part.  I've seen pictures of these mounted on somewhat modified garden tractors (complete with mower decks) and that was the starting point.  However, with my requirements growing, that may not be the best choice.

The original requirements include:

  • As accurate as possible to the original in size and appearance
  • Forward and reverse capability
  • Braking capability
  • Electrics such as headlights, marker lights, brake lights and horn
  • Floating front and rear suspension (single leaf)
  • Correct paint and markings

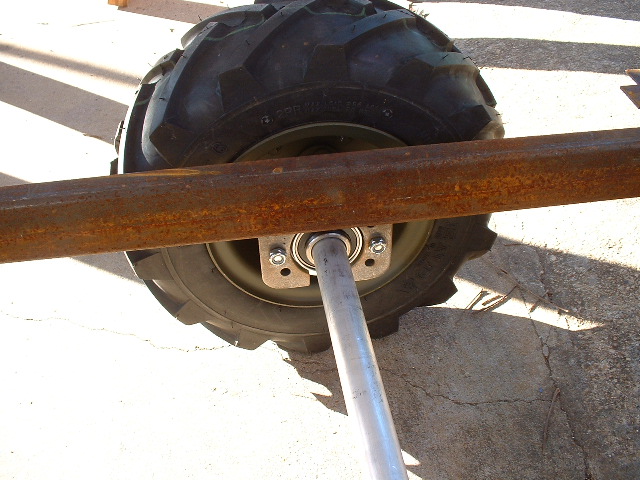
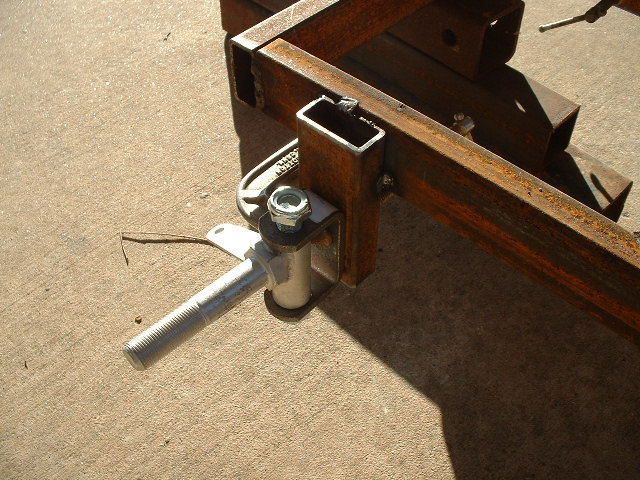
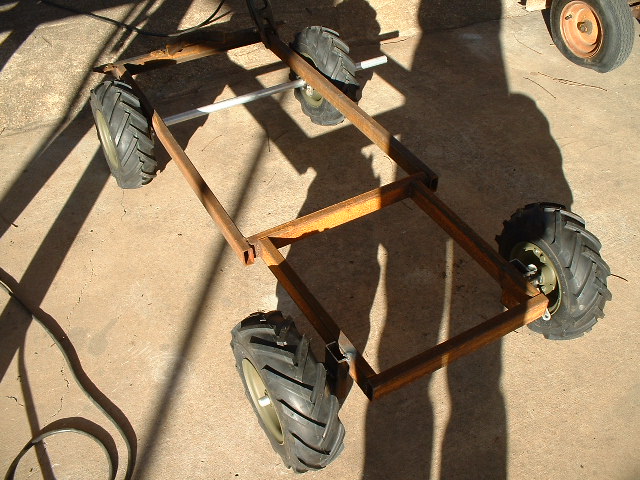
After looking at many pictures of others, I concluded that most people have strayed away from originality in tire size.  I wanted to remain original which would leave an 8" rim, 14.5" overall tire diameter and 3" wide.  I also began to look at drive train assemblies and to have an engine in the front bay area required a long chain and or belt system to transmit power to a rear axle of some type.  This also made reverse a real nightmare.  Braking remains simple with a disc of some type from a garden tractor or go-kart.  Steering remains simple utilizing garden tractor components or go-kart components.

With the above floating around in my head, I started looking at an electric drive system.  The batteries could be located in the engine bay and all that is required to the rear is a positive cable to a small electric motor.  This would solve the long chain/belt issue as well as provide reverse and braking all in one mechanism.

Work to date includes:

02/21/2003 (Frame #1)
build01.JPG (33170 bytes) build02.JPG (25208 bytes) build03.JPG (24859 bytes) build04.JPG (23183 bytes)
Rear bumper/pintle cross member Rear bumper Rear frame member, side rail Rear frame mock-up with 45 degree forward member (didn't use this idea)

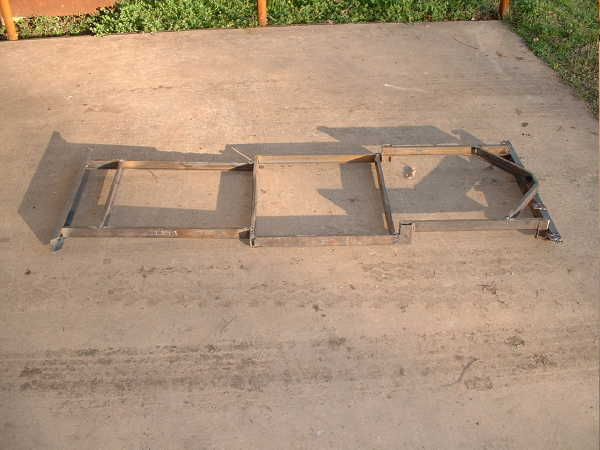
02/22/2003 (Frame #1 continued)
build05.JPG (25062 bytes) build06.JPG (30238 bytes) build07.JPG (29911 bytes) build08.JPG (20892 bytes) build09.JPG (22748 bytes)
Rear sub-frame Rear sub-frame Rear sub-frame with seat area framed up Mounted rear bumper and pintle intact Rear side frame rail
build10.JPG (22856 bytes) build11.JPG (35968 bytes) build12.JPG (37261 bytes) build13.JPG (28455 bytes) build14.JPG (28440 bytes)
Rear side frame rail Underneath completed rear end Completed front engine box, grill support and front bumper Completed Frame #1 Completed Frame #1

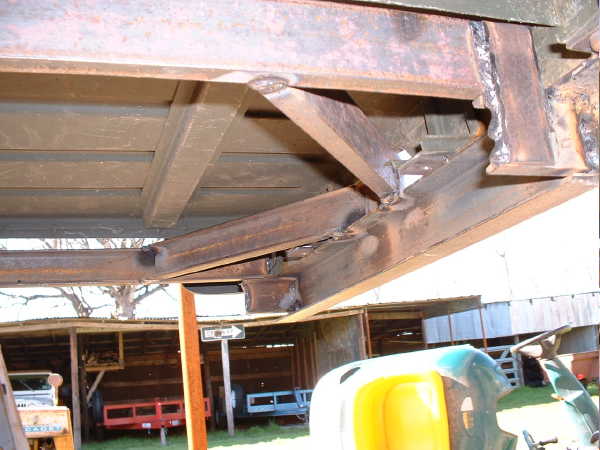
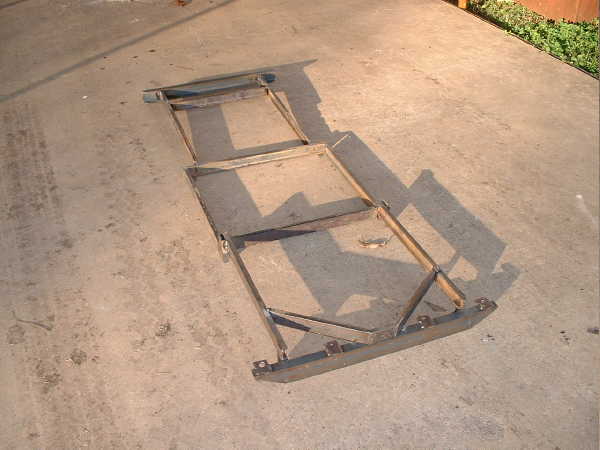
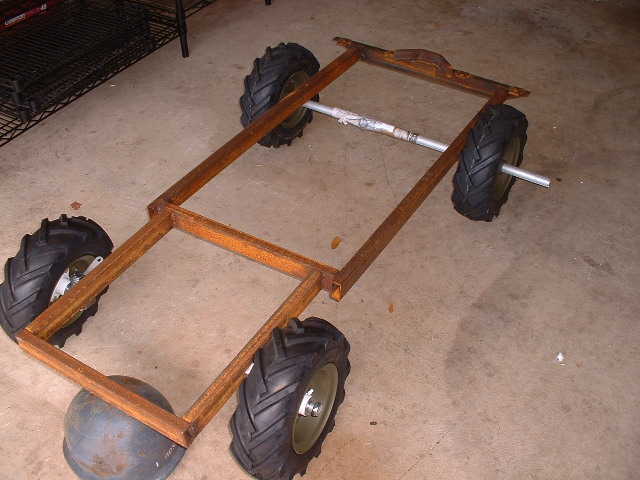
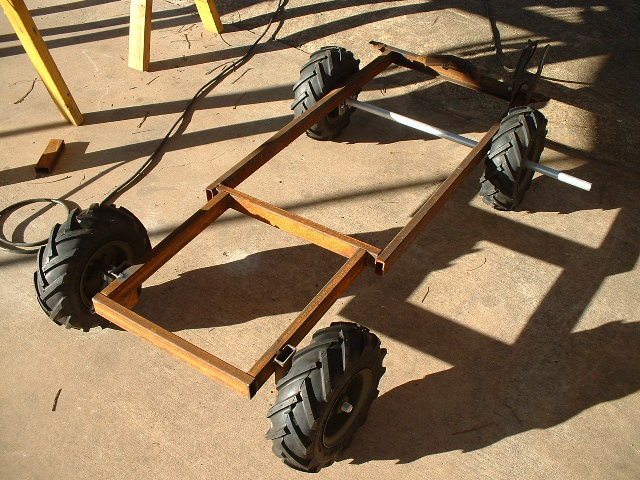
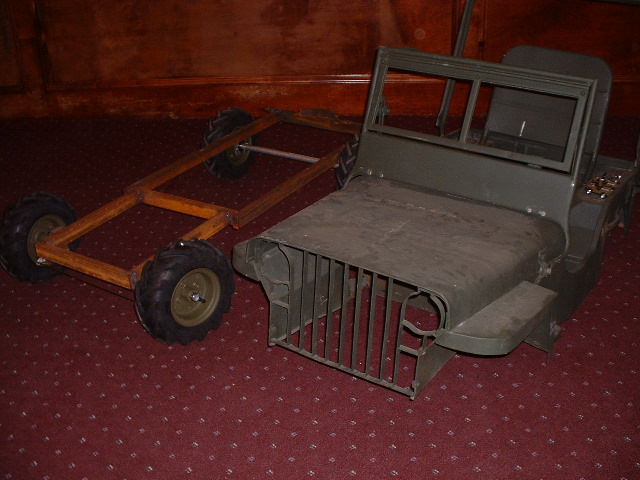
10/10/2003 (Frame #2 - Better)
frame2_a.JPG (34705 bytes) frame2_b.JPG (35537 bytes) frame2_c.JPG (35924 bytes) frame2_d.JPG (36462 bytes) frame2_e.JPG (35710 bytes)
Rear box frame area ready to weld Rear frame rails notched for new bumper Mock up of a rear wheel/tire assembly Rear Mock up of the front engine bay
frame2_f.JPG (35861 bytes) frame2_g.JPG (52858 bytes) frame2_h.JPG (32039 bytes) frame2_i.JPG (34925 bytes) frame2_j.JPG (40016 bytes)
Front engine bay Engine bay Where the front spindles will mount Utilized the first pintle assembly, scabbed it in Frame #2 From the front
frame2_k.JPG (40267 bytes) frame2_l.JPG (28238 bytes) frame2_m.JPG (24002 bytes)
Side view Engine bay Rear view

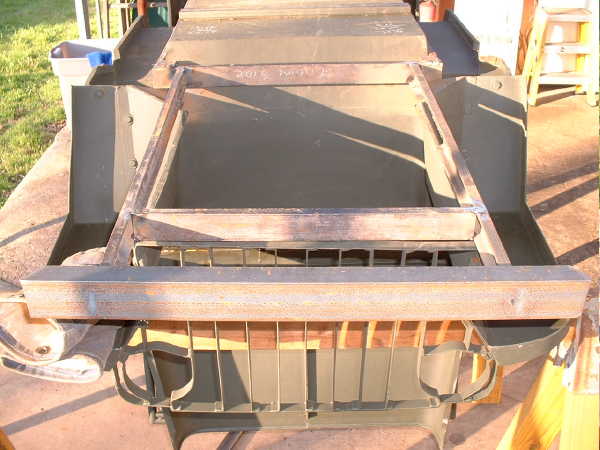
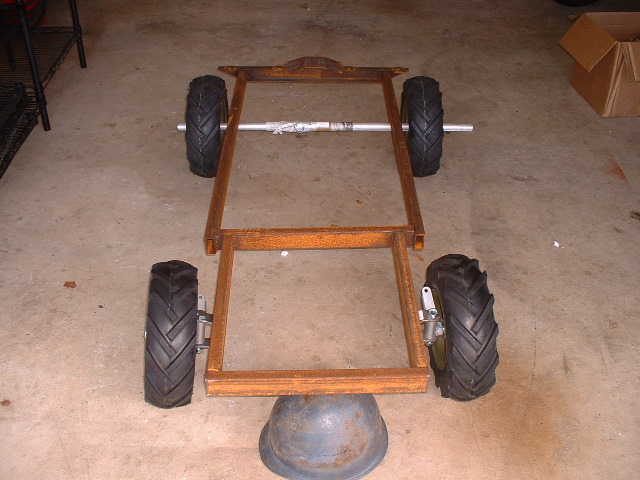
11/12/2003 (mock-up)
rims_a.JPG (32121 bytes) rims_b.JPG (28191 bytes) rims_c.JPG (32945 bytes)
In place.  Needs correct spacing Yes, that's a 'fixed bale' WWII helmet... Rear axle with tires

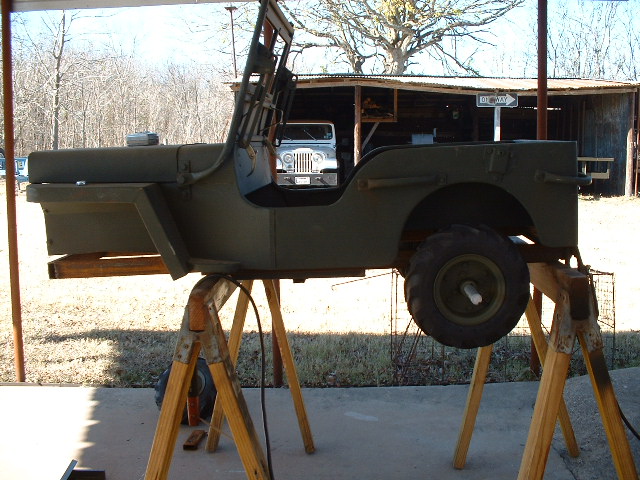
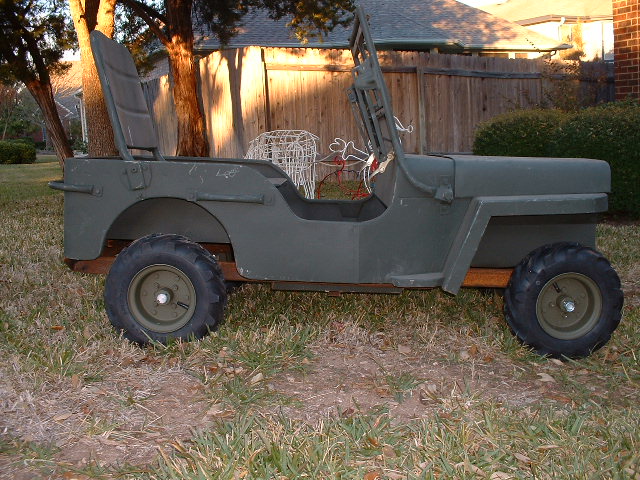
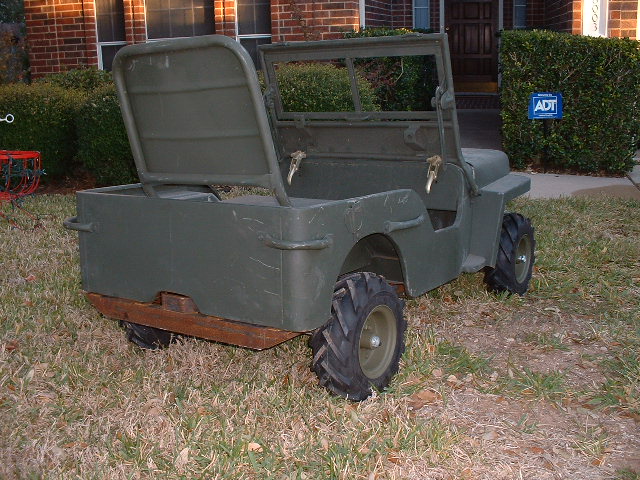
12/17/2003 - Rolling Chassis Completion!
rolling_1.JPG (122678 bytes) rolling_2.JPG (126218 bytes) rolling_3.JPG (124257 bytes) rolling_4.JPG (129907 bytes)
Rear bearing hanger Completed rear axle
rolling_5.JPG (124307 bytes) rolling_6.JPG (131839 bytes) rolling_7.JPG (124620 bytes) rolling_8.JPG (126087 bytes)
Front spindle mock-up Rolling Chassis!
rolling_9.JPG (127354 bytes) rolling_10.JPG (125419 bytes) rolling_11.JPG (116847 bytes) rolling_12.JPG (126888 bytes)
It's a ROLLER! Frame and Body...
rolling_13.JPG (124686 bytes) rolling_14.JPG (127320 bytes) rolling_15.JPG (124983 bytes) I know...  Your saying the rims and tires are too small.  Well, the next size up is just a bit TOO big but there's room for them should I upgrade in the future!
6.00x13x6.00 tires with an OD of 13.4" Next size is up is 16.4" OD which is more than half of the stock 29" AND it goes on an 8" rim So...The 6.00x13's will do for now. To upgrade would involve purchase of new front and rear hubs, wheels, tubes and tires for about $335

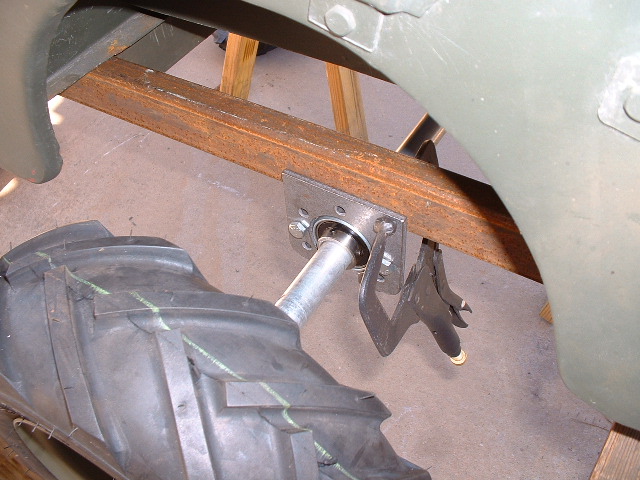
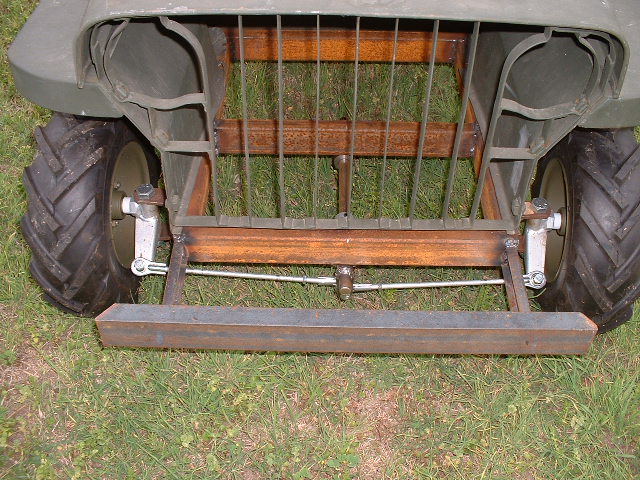
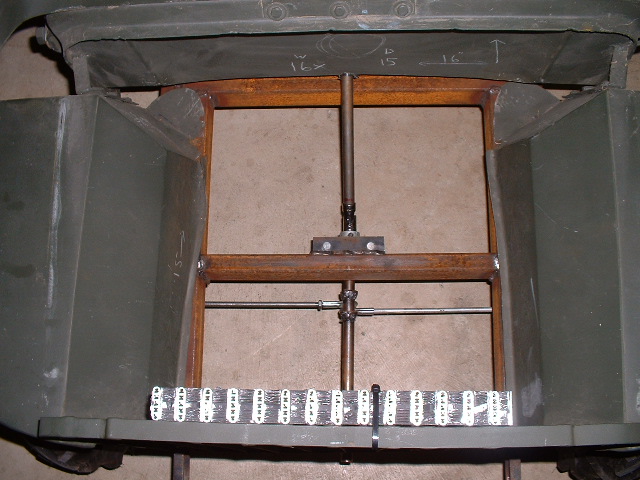
04/02/2004 - Steering/Tie-Rod Ends etc...
steer_a.JPG (128287 bytes) steer_c.JPG (122864 bytes) steer_b.JPG (128927 bytes)
Added front bumper Fabricated/installed steering components Almost done!

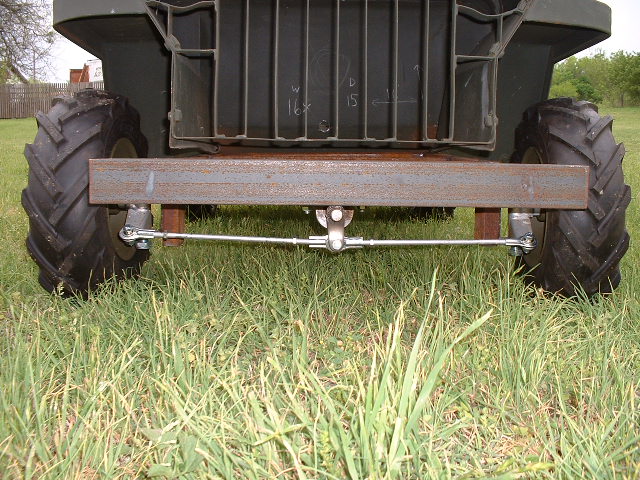
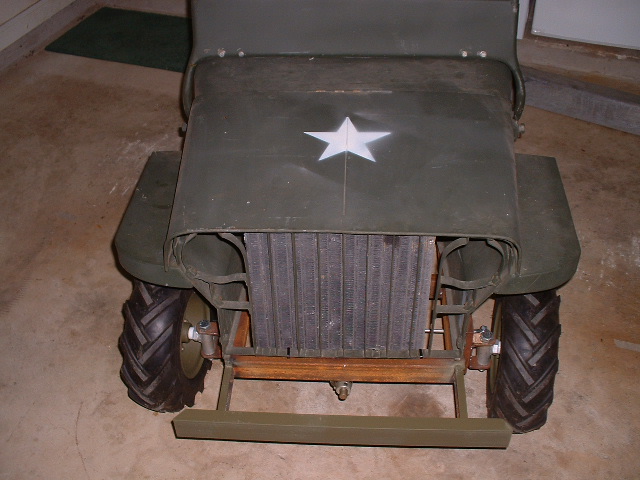
04/06/2004 - Correct reversed pitman arm error, cut faux radiator

04/08/2004 - Finish steering, fabricate jerry can bracket/spare tire bracket and install
steer2_a.JPG (127598 bytes) steer2_b.JPG (123755 bytes) steerwheel.JPG (119147 bytes) jerryspare.JPG (127295 bytes)
NEW steering, (reversed spindles) Faux radiator, star and paint for concept Steering wheel Jerry can and spare


Sold it!


Copyright 1997-2010, All Rights Reserved
 Privacy     Webmaster