Home
Up
| | Major
Mess
COMPETITION BBQ
TEAM
I've got to quit building all these pits with military ranks - it's
starting to get confusing which is which!
So here's the fourth shot at a trailered bbq pit and this one will be
(hopefully) the last for a very long time. I'm part of an internet bbq
forum over at TexasBBQRub.com and have
met a great bunch of guys and gals with a common thread between all of us.
That would be the love for low and slow cooking, ie: about 225*F with the meats
rubbed and wood burned for smoke flavor. As you may have read, I started out with
my first attempt using an older M416 trailer I restored but couldn't bring
myself to cut a tailgate in it. Then I built Private Mess which was
stolen, and then Sergeant Mess which is still on Active Duty with the
Lonestar-MVPA historic
military vehicle club. That brings me to the building of "The
Major".
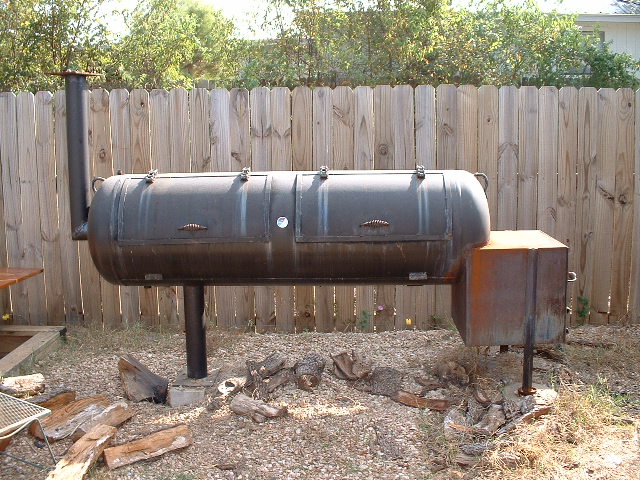
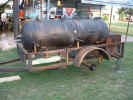
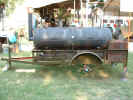
Brent, a buddy I met on the forum had a 150 gallon propane tank in his
backyard he built into an awesome smoker a while back. Since he completed "Trinity", a
monster of a trailered pit, he had no use for the one in the back yard. I
got a message he was interested in moving it out along with a smaller 4'x8'
trailer he had for yet another project. Needless to say, I jumped on the
opportunity. So, here's the story of the build of "A Major
Mess".
06/11/2006 (Sunday - 10.00hrs/10.00hrs total)
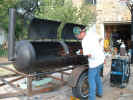
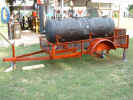
Well, we got it mounted! I met Brent at his place about 9am on what was to
be a very hot Sunday. He had already plucked the pit from his backyard
with his tractor and
had the pit out front just sitting on the little 4x8 trailer ready for us to attack
it. After pulling out a few tools to remove the old rotten wood and
misc. hangers and just "looking" at it, we decided to just set it in
place and see what needed to be done. Brent said every time I fired
up his Hypetherm
PowerMax 600 Plasma cutter I had a grin on my face from ear-to-ear and was
actually laughing as I made the cuts. This tool is amazing in how clean
and fast it cuts. His is rated at continuous 5/8" or it can sever
7/8".
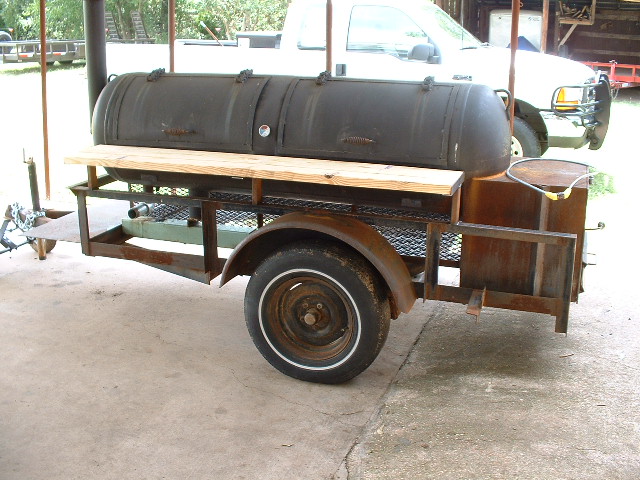
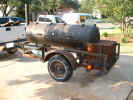
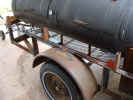
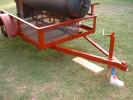
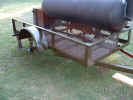
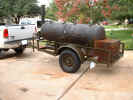
We originally had the firebox hanging off the tail, but the trailer was
tail-heavy and that wouldn't work. So we picked the pit up and moved it
forward resting the firebox inside the trailer and the tongue weight was
considerably heavier, but still manageable to roll it around by hand with one
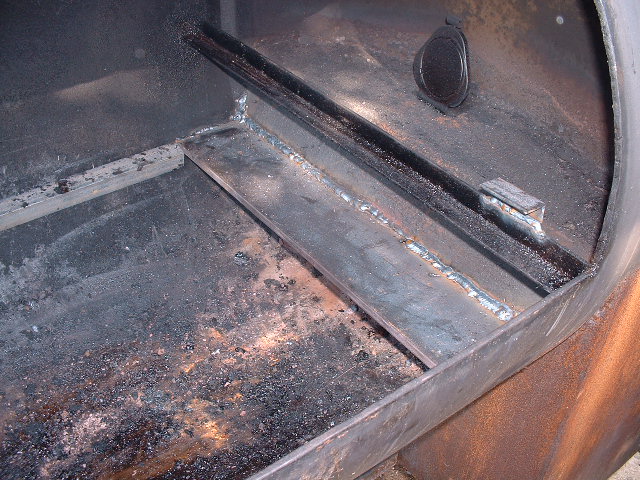
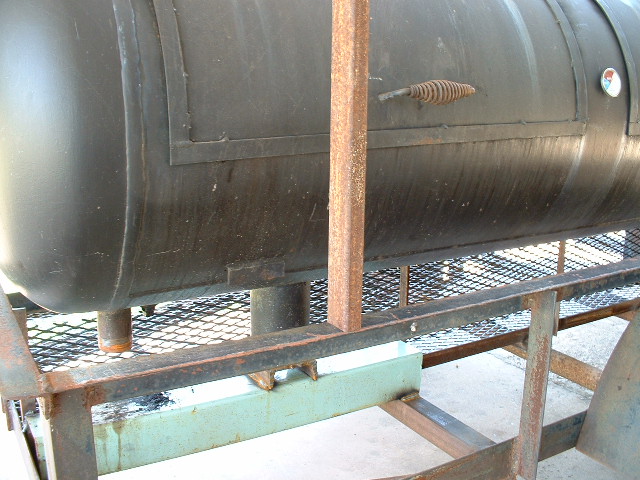
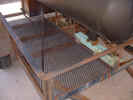
person. Once we got it where we wanted, we began to center and level the
pit on the trailer. Once it was secured in place we began some neat
modifications including the addition of a 2" drain nipple, cutting the
baffle plate and welding in a fixed plate, the addition of two more tuning
plates on new rails, and slide stops for the food racks. This was also the
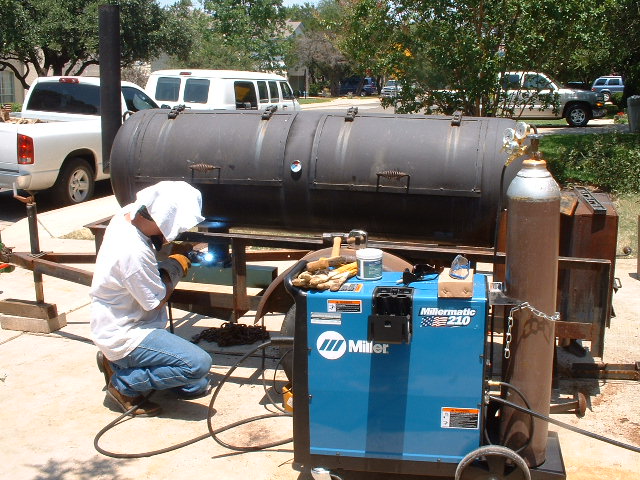
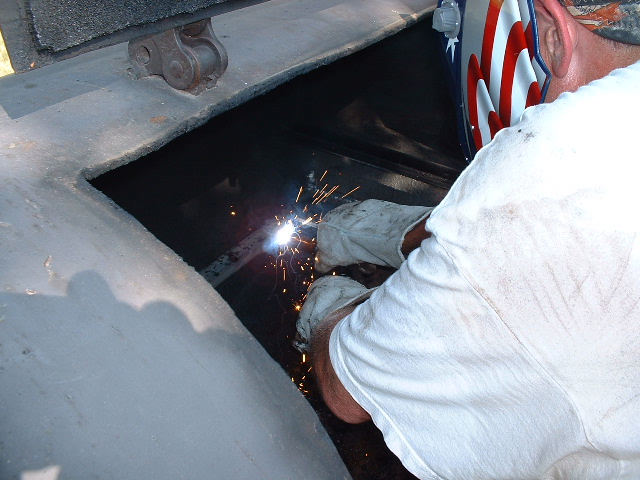
first time I've used a wire-feed welding unit. His MillerMatic
210 is a MIG system using Argon gas. Talk about a clean, fast
weld. WOW. Makes me never want to use a stick welder again.
About 7pm, it was time to call it a day. We put some temporary lights
on the trailer and I headed out to the inlaws place where I would finish the
build there. This time, the pit has several chains, a tongue lock and
several hidden game cameras pointing to it so thieves beware!
 |
 |
 |
 |
 |
| The pit in the
backyard |
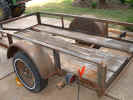
The little 4x8
trailer |
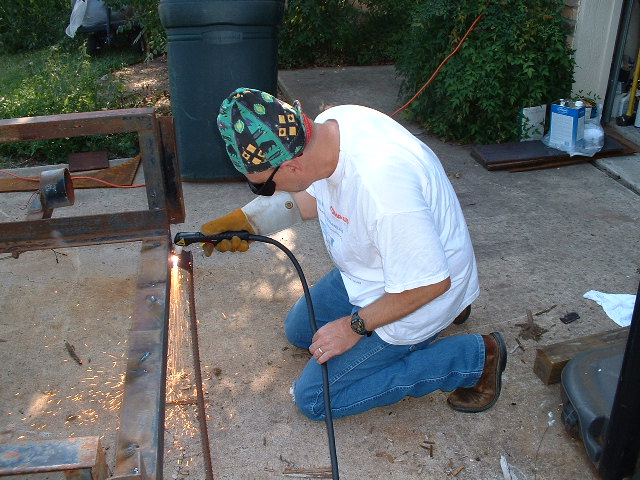
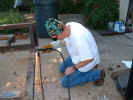
Me cutting off
ramp rails with the plasma cutter |
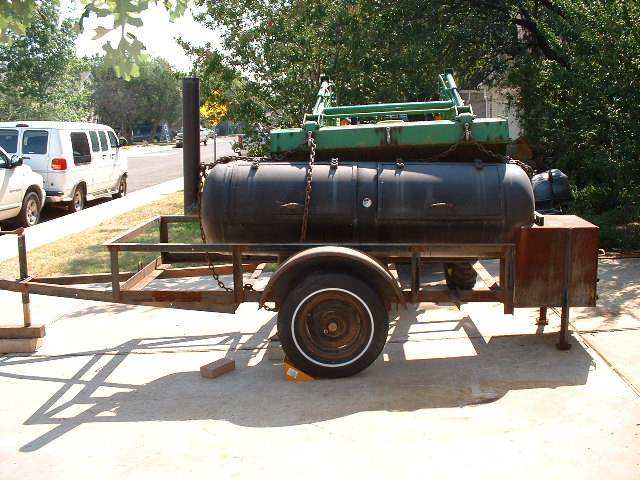
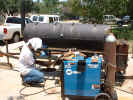
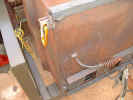
Resting in
place the first time |
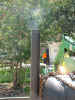
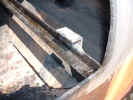
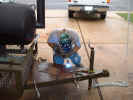
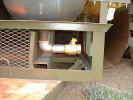
First
Smoke! Actually from cutting the pit for the 2" drain |
 |
 |
 |
 |
 |
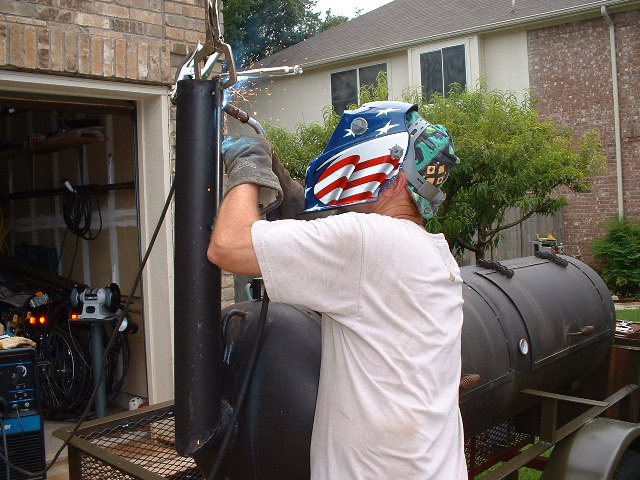
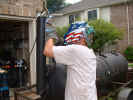
| Me welding the
nose section in place with the Millermatic 210 |
Slide-in rack
stops |
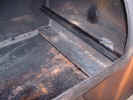
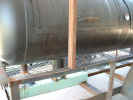
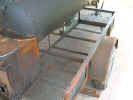
Welded baffle
plate and angle iron rails for tuning plates |
Brent finishing
the tuning plate supports |
Tuning plates
in place with rails |
 |
 |
 |
 |
 |
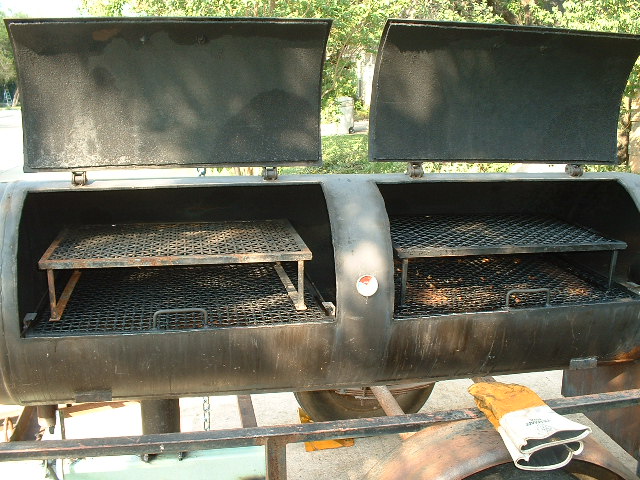
| The addition of
two more tuning plates |
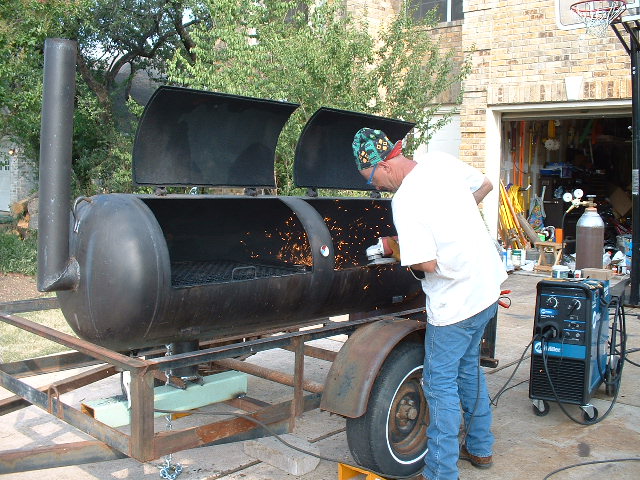
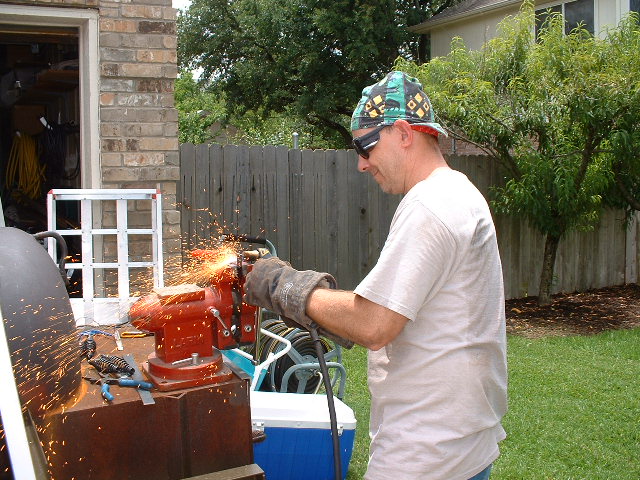
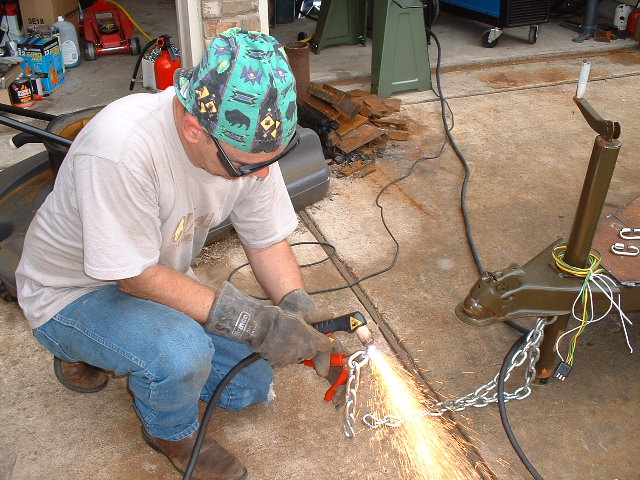
Me grinding a
high spot on one of the doors |
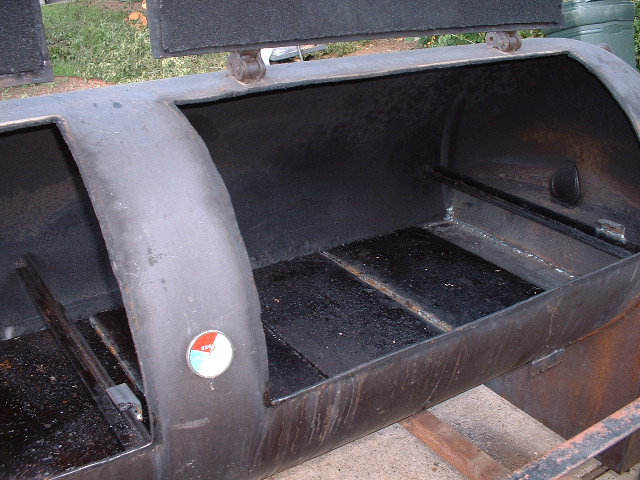
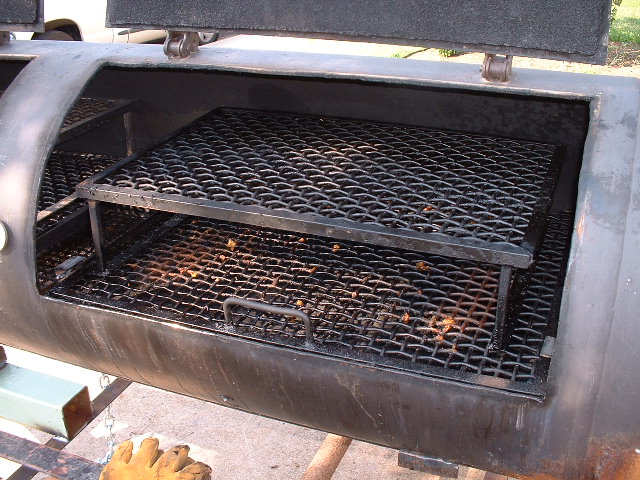
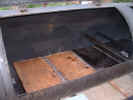
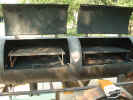
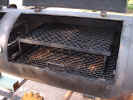
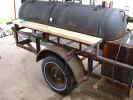
Inside with
racks in place and double-stackers |
Good use of
space with the double-stackers. Plans are to add a second slide-in
shelf |
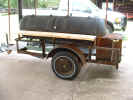
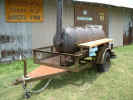
Temporary
lights on and ready to haul home to finish! |
06/18/2006 (Sunday - 6.00hrs/16.00hrs total)
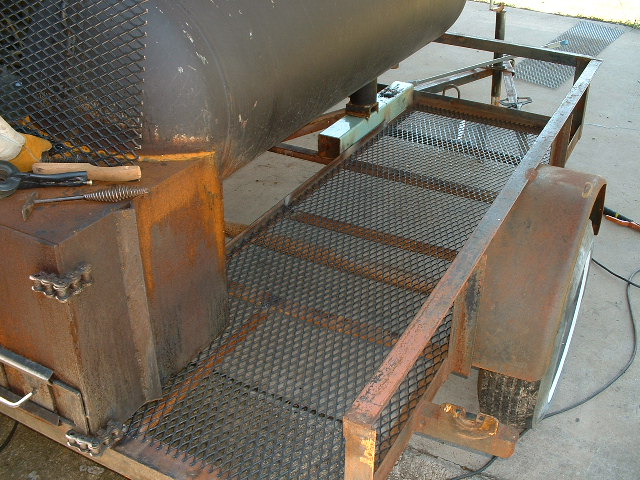
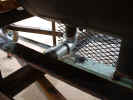
Today was figure out how to install the flooring so I could carry around wood
for the firebox, coolers, chairs, the canopy etc. I had purchased a 4x8
sheet of expanded metal and simply measured the shape I wanted. Then
taking a cheap pair of Harbor
Freight bolt cutters, cut the expanded metal a snip at a time. Once I
had the final floor, I rested it in place and realized I needed some additional
floor supports. So, I added three or four more supports and can now stand
on it with no sagging. Next I measured under the pit belly to get the
right size for the back of the flooring. This will prevent stuff on the
floor from falling off the 'back-side'. Using the Harbor Freight cutters
again, I snipped this section fairly quickly.
Next up was the cutting of the angle iron supports for the belly expanded
metal. I welded a piece of angle as the major support for the floor
expanded metal, then attached the vertical angle sections one by one. All
that remains now is to tack the floor down for good and the belly piece in
place. Well, I probably ought to put some expanded metal on the open sides
of the trailer, but for now, this will work just fine.
|
 |
 |
 |
|
|
Expanded metal
floor cut to fit |
Additional
support welded in place |
The belly
vertical piece ready to tack down |
|
06/19/2006 (Monday - .50hrs/16.50hrs total)
Today was really just a measure and think how to fabricate the shelf. I
had a couple ideas including attaching an angle frame directly to the pit and
then putting expanded metal in the frame for the shelf. Based on Brent's
experience, anything connected directly to the pit acts as a heat-sync and warms
up to the pit temp, or about 225*F. So, I looked at the next best option
to NOT attach to the pit and came up with using the side rail of the trailer as
the mounting point. The side rail is 2" wide and I just happened to
have some 1"x2" tubing that will work perfectly. I'll simply cut
three legs about 6" tall and weld them to the side rail. Then, I'll
take some 1-1/2" angle on each end for securing either expanded metal or a
couple of sanded and varnished 2x8's in yellow pine. The center will have
some flat bar welded to the top. All three supports will have carriage
bolts running through the wood if I go that route.
|
 |
|
 |
|
|
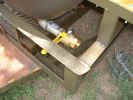
You can see the
trailer side rail and how easy it will be |
|
The
1"x2" tubing mocked up |
|
|
|
|
|
|
06/24/2006 (Saturday - 4.00hrs/20.50hrs total)
Today was fabricate the shelf legs and get the 2x8 shelf materials in
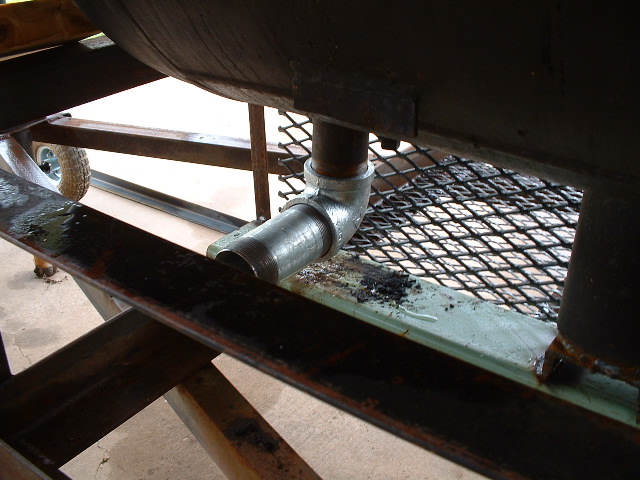
place. But first, I attached the 2" elbow and nipple for the ball
valve drain (yet to be purchased). Next, I took some 1x2 tubing and figured out the right height for the
shelf legs, then cut the angle iron for the two end pieces along with the flat
bar for the center support. Once that was welded in place, I could place
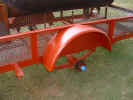
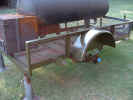
the 2x8's in the frame. However, my plan was interrupted by the fact that
I didn't have 15" available for the shelf without hanging past the fender.
So, I put one 2x8 in place, and ripped the other at 4" giving me a 12"
shelf the width of the horizontal.
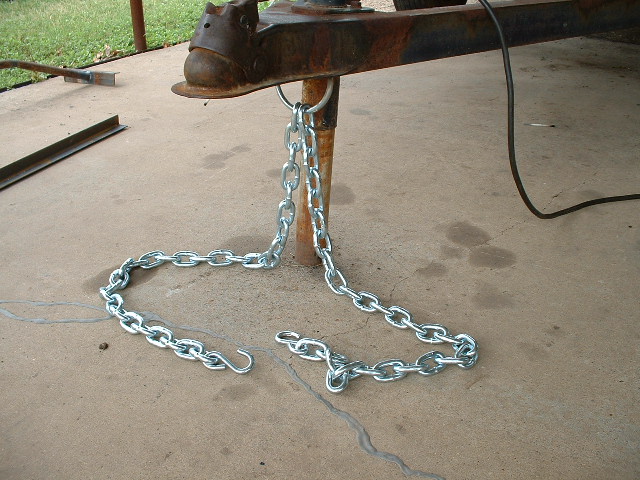
Next was installing the 5/16"
trailer safety chains and s-hooks. For this I took a 1/4" thick
u-bolt and ran the two loose ends of the chain thru the links, then held the
u-bolt in place in the trailer a-frame and welded away. A couple of
s-hooks were added and one side pinched in a huge vice we have.
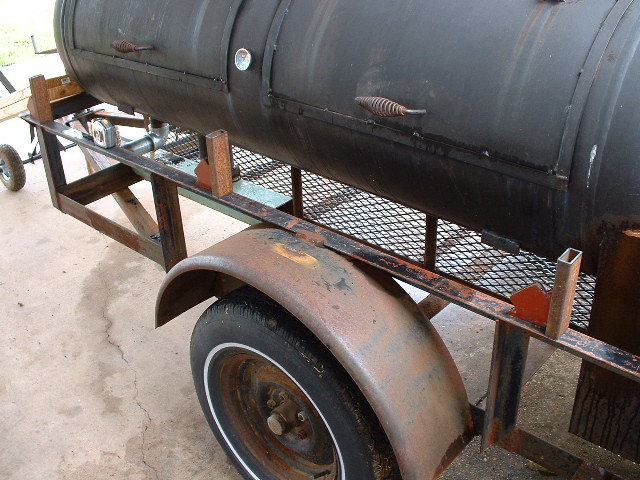
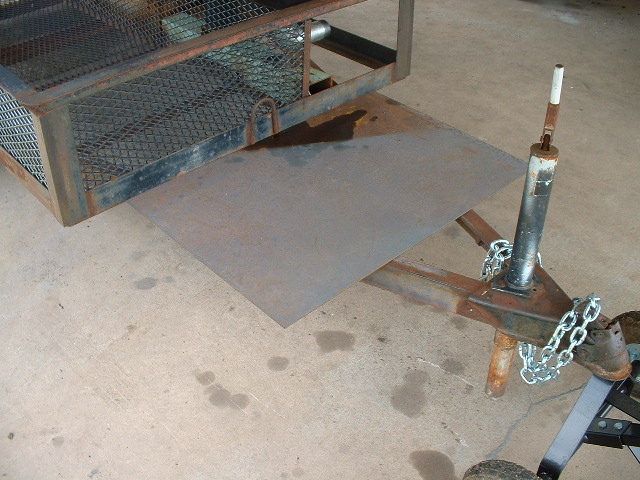
Finally, I cut some additional expanded metal to cover the front of the
trailer as well as the long side. Now I've got expanded metal giving me a
complete box except the small area back by the firebox. I haven't figured
out what to do there yet. I also placed some 1/8" plate on the tongue
to get some more weight there, but really to see how I can fill in the nose
section for the turkey fryer installation.
 |
 |
 |
 |
 |
| Here's the
2" elbow and nipple |
Lining up the
shelf supports |
Angle in place
with one 2x8 |
Safety chains
installed |
12" shelf
installed |
|
 |
|
 |
|
|
Expanded metal
on all sides now |
|
I'll have to
scab this into two pieces |
|
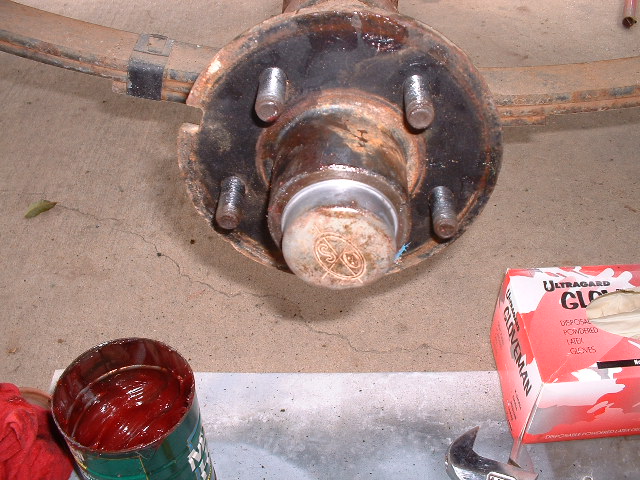
06/25/2006 (Sunday - 2.00hrs/22.50hrs total)
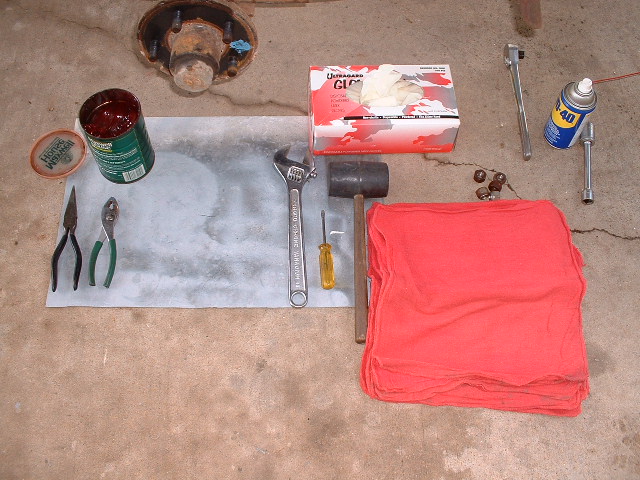
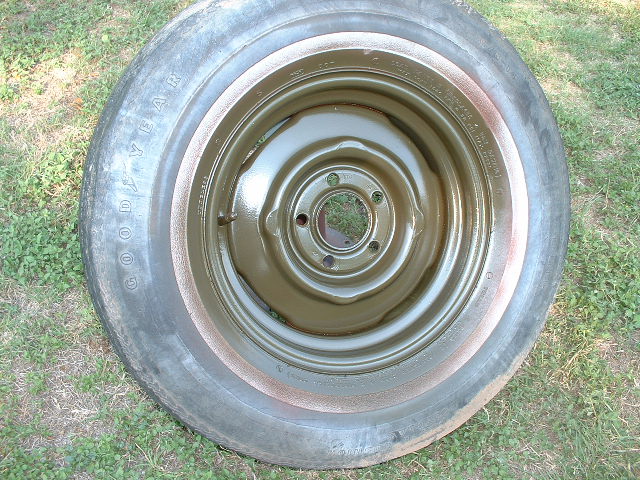
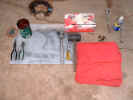
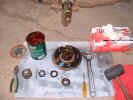
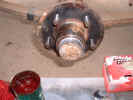
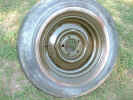
Today was sort of slow. I decided to repack the wheel bearings. They
were in pretty good shape as I took both sides apart so I didn't feel any need
to replace bearing sets or seals. I started by pulling off the dustcaps,
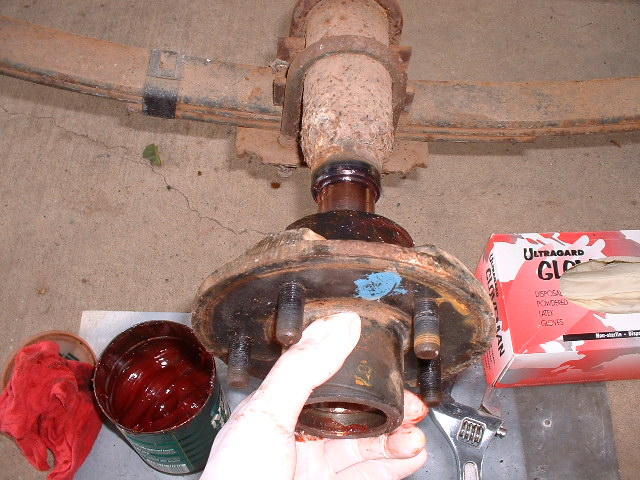
cotterpin, nut and washer. Once the outer bearings were out, I pulled off
the hub assembly. No scoring was noted so I cleaned the pin, nut and
washer along with the outers in a kerosene bath, air dried them and repacked
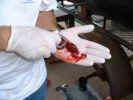
with grease. The inner bearings I managed to squeeze fresh grease into the
race, clean the dust seal lip and assembled it back.
 |
 |
 |
 |
 |
| All the 'stuff'
ready to go |
Hub assembly
off and parts cleaned |
Repacking |
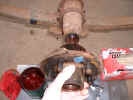
Ready to
reinstall |
Done! |
|
|
|
|
|
06/26/2006 (Monday - 1.50hrs/24.00hrs total)
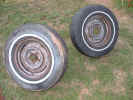
After work I hand-sanded the exterior frame, rails and sandblasted the wheels on
both sides. About 7pm I decided I ran out of daylight to get the priming
done and have light for clean-up. I'm thinking tomorrow after work I'll
prime the frame exterior.
|
 |
|
 |
|
|
On blocks and
the frame sanded |
|
Rims
sandblasted |
|
06/27/2006 (Tuesday - 1.50hrs/25.50hrs total)
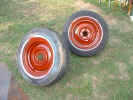
All I have to say is..... I LOVE this primer! It's very expensive at
about $180 gallon, but it shoots so evenly, dries quickly and is rock hard and impervious
to brake fluid and other chemicals. After work, I headed over to
Kaiserville and taped off the dust caps. Next I mixed up about 32oz of
primer and began to shoot the rims, then worked on the trailer. By the
time I was done with everything, I had some primer left over, so I started at
the rims and worked the trailer until the gun was empty. Total time
including setup, shoot and clean-up was a whopping 1.50 hours. I'll let
this dry overnight and shoot paint tomorrow! (now if i could just
figure out which color i'll use....)
 |
 |
|
 |
 |
| Rims hit twice
with primer |
Frame primed |
|
Man I love this
primer! |
Tongue that
will be filled in |
06/28/2006 (Wednesday - 2.00hrs/27.50hrs total)
A great day at Kasierville! Again, after work I headed over to Kaiserville
and set up the gun to paint a coat of Olive Drab #24087 (Late Korea, early
Vietnam era) on the wheels and exterior of the pit. Mixing 28oz of paint
and 4oz of Zylene, and shooting out of my 'quart pot' at 25psi, I didn't get any
paint! Oh no, what happened? After some fiddling around, I realized
the siphon tube to the exterior was clogged. After cleaning it out, the
gun ran like a champ. I shot the whole exterior with the quart and have
enough paint left over to shoot the expanded metal after it's cleaned and the
trailer for a second coat after all the fabrication/welding is complete. I
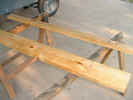
cleaned up the gun, then started hand sanding the lumber for the shelf.
Once that was smooth, I applied a liberal coat of a polyurethane sealer for
protection. When that was done, I took a close look at the trailer paint
and it really turned out nice. There are a few 'light' spots, but I'll get
that on the second round.
 |
 |
 |
 |
 |
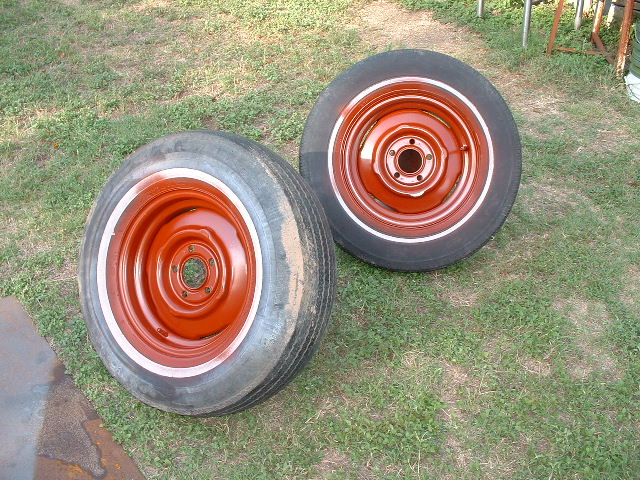
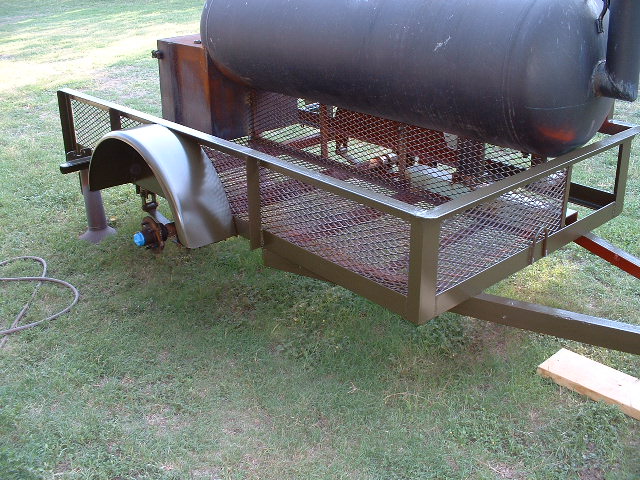
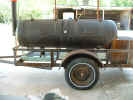
| The rims turned
out very nice |
The trailer
looks good too. |
Missed a few
spots, but I planned on a second coat |
|
The shelf
lumber sealed and drying |
06/30/2006 (Friday - 1.00hrs/28.50hrs total)
I secured the trailer registration today along with picking up the rims to
hopefully get tires tomorrow.
07/01/2006 (Saturday - 2.00hrs/30.50hrs total)
Today was whirlwind around town here and there! First was several calls to
locate trailer tires. Seems that Carlisle is about the only tire
manufacturer that supplies a large distributor network so I went over to
Discount Tire and had them mount a set of 205/14's on my rims. While they
were doing that, I headed over to Cabela's and a travel trailer place to look at
license plate holders and hitchlocks, neither of which I purchased. I also
made a stop by Wal-Mart to pick up a fire extinguisher, paper towel holder,
smaller neck 12volt bulbs for the trailer lights, a license plate light and a
set of wheel chocks. After that, I headed over to Discount Tire to pick up
my new tires, then back to pick up the trailer to get ready for Sunday. I
gave thought to mounting the shelf, but just ran out of daylight.
07/02/2006 (Sunday - 7.00hrs/37.50hrs total)
About 8:15am, I headed out in the rain pulling the trailer up to Brent's place
to do some more fabrication on the pit. I knew I hadn't wired the
stop/tail lights yet, so I was a bit concerned about a traffic stop. Yet I
had no problems getting up there. About 9am, it was still raining so Brent
and I looked at his vacation pictures and had coffee with Irish Creme.
Around 10 or so, the rain let up and we secured his neighbors EZ-Up tent and now
had a dry area to work. First up, we attacked marking and cutting the
1/8" plate for the nose section. That went fairly well, although we
had to put two pieces up front since the one wasn't big enough. Next, I
welded a couple large washers, one on each side, to hold the safety chains when
the trailer is parked. After that, the sun started to peek out and Brent
fired up his R2D2, aka: Weber Smokey Mountain and cooked some chicken breasts,
sausage and fish. While that was going on, I started to tack down all the
remaining expanded metal in the trailer bed area. What amazed me is the
paint peeled as expected from the heat, but the primer was unblemished.
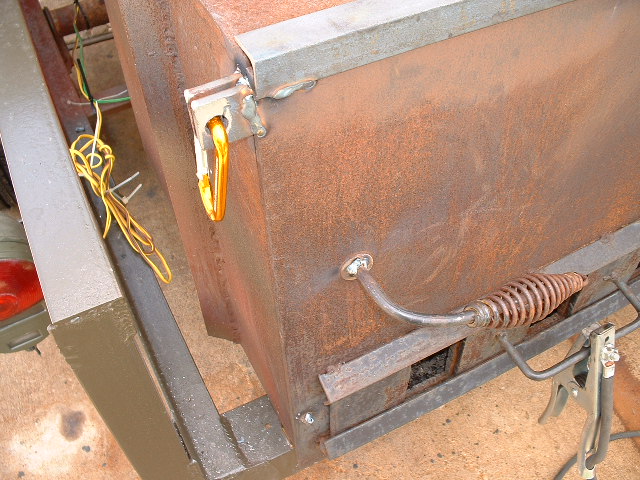
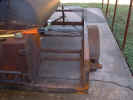
When they were done, we added a lip over the firebox door, a pin-locking
mechanism, a air-intake blob of weld to keep the intake in place, and corrected
the wobbly firebox door lever with washers on the inside and outside of the
lever. We had a great lunch of grilled chicken breasts and a beer and
watched a bit of the F1 race then back to work. We cut a piece of pipe to
hold the fire extinguisher, but couldn't figure out where to mount it. The
smokestack cover was next using some round stock and tubing, and then it was
time for cutting a few links out of the safety chain with the plasma
cutter. When all that was done, we picked up and I quick-wired the lights
and they worked perfectly. Overall, today was almost the end of the
fabrication work I wanted to get done.
|
|
|
|
|
 |
 |
 |
 |
 |
| Welding the
nose section in place |
Plasma cutter
for firebox lock |
Firebox lip,
lock, and door handle fix |
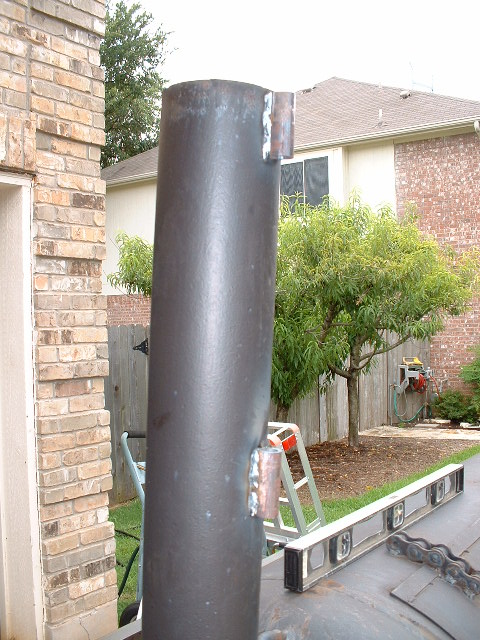
Welding the
smokestack brackets |
Finished
brackets |
 |
 |
 |
 |
 |
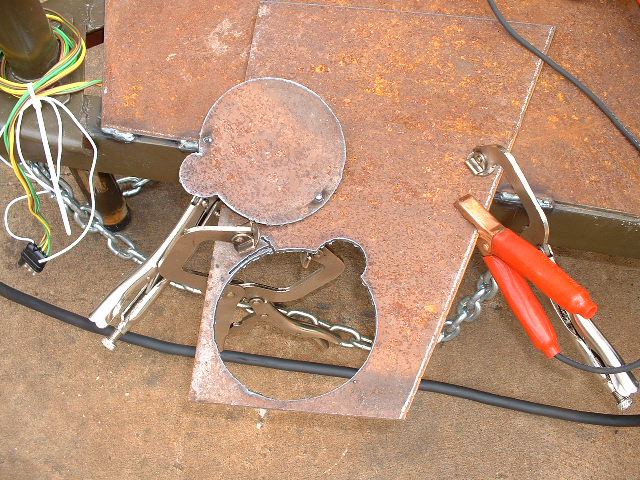
| Plasma cutting
the smokestack top |
What a
beautiful tool that plasma cutter is! |
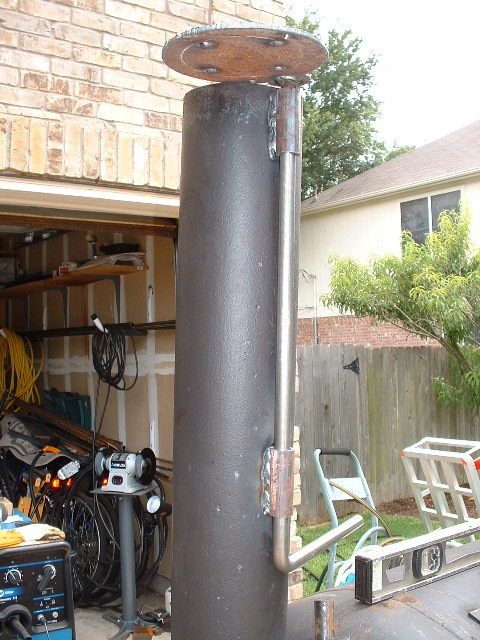
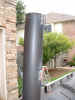
The finished
smokestack |
Cutting the
extra links |
Ready for the
haul home |
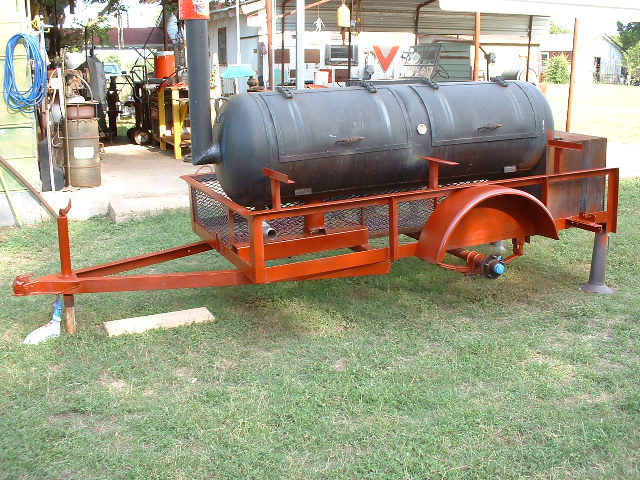
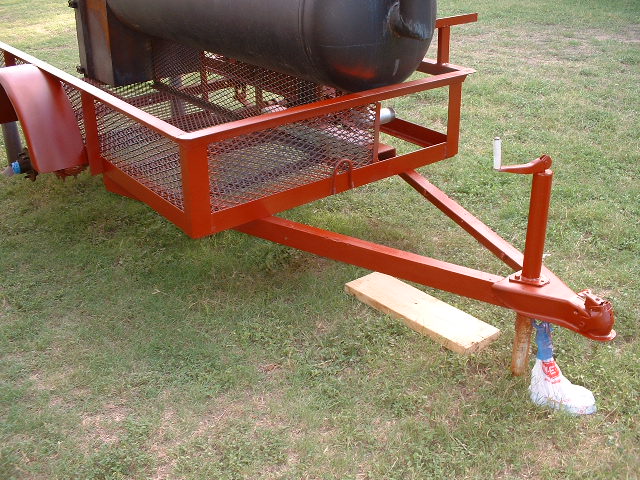
07/03/2006 (Monday - 1.5hrs/39.00hrs total)
It's coming along nicely! I figured I'd just go ahead and make the push to
get some more done today and was pleased with the results for the little bit of
time spent. I made a few calls and located a caster wheel for the front
nose jack. Once I had that, I headed over to work on finishing up some of
the details now that the Phase I fabrication work is completed. I
installed the yellow-pine shelf in the brackets with carriage bolts, then
mounted the paper towel holder. After that, I wrapped the wiring harness
at the coupler with some plastic wrap loom material for protection. As the
wiring stands now, I'll still go back and clean up the installation.
Finally, I added the primered 'good luck' horseshoe that was common to many
military vehicles from Texas. About all that remains at this point is
cleaning, prime and paint and then touch-ups here and there. The rest is
easy simple stuff.
|
|
 |
|
|
|
|
Almost done... |
|
|
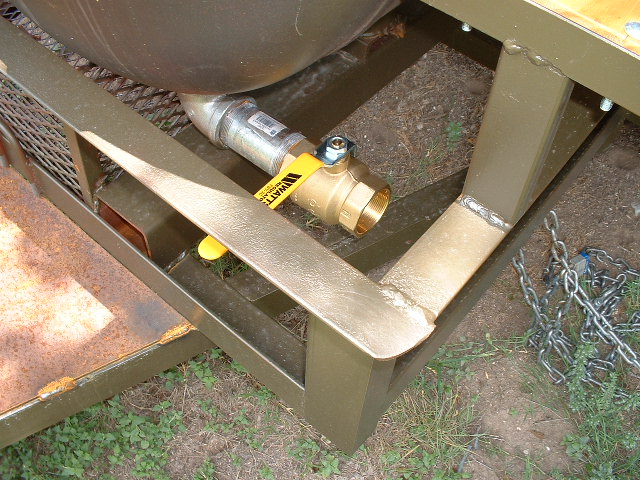
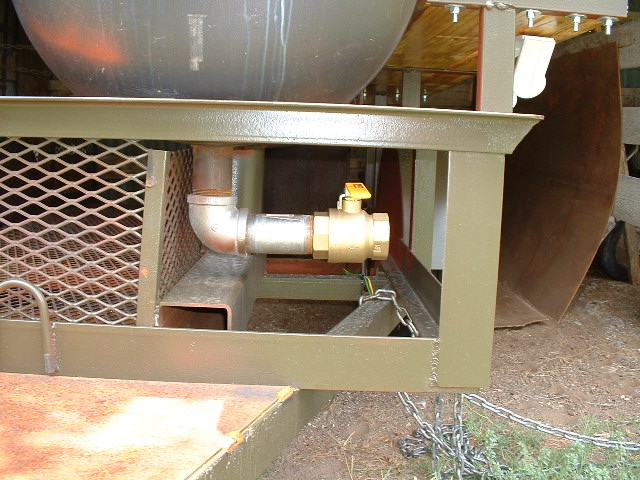
07/09/2006 (Sunday - 0.25hrs/39.25hrs total)
This was soooooo simple today. Drive to Brent's place. Pick up said
ball-valve. Drive home. Install. Done.
|
 |
|
 |
|
|
Angled
perfectly |
|
Looks like the
welded nipple was just right |
|
Remaining Work:
| Phase
I |
|
|
| 50% done |
Sand/Prime & Paint trailer
Olive Drab, Pit Black |
Reprime/repaint
welded areas and new stuff |
|
Purchase/install spare
tire/rim (fabricate mount) |
|
|
Sand
pit/firebox, prime and paint black |
|
|
|
|
| Phase II |
|
|
|
On-board 5
gallons water in jerry can |
|
|
Turkey fryer on nose
section |
|
|
Toolbox/ammo can for
supplies |
|
|
Second
slide-in shelf |
|
|
Lockdown
mechanism for tuning plates |
|
|
Flag and
mounting |
|
|
BBQ sign and
mounting |
|
|
|
|
Costs to Date:
| 06/11/2006 |
Pit and trailer |
|
| 06/16/2006 |
Expanded Metal (4x8 sheet) |
$ 53.76 |
| 06/19/2006 |
Shelf hardware (carriage bolts) |
$ 17.69 |
| 06/23/2006 |
Expanded Metal (4x8 sheet) / Angle iron |
$61.25 |
| 06/23/2006 |
Shelf wood, safety chain, 5'
cable lock, 2" pipe fittings |
$ 66.45 |
| 06/26/2006 |
PPG's DPLF74 2-part red epoxy
primer |
$ 126.33 |
| 06/24/2006 |
Wiring harness, two sets single filament bulbs for
stop/tail
|
$ 15.35 |
| 06/30/2006 |
Trailer registration/tags
|
$44.40 |
| 07/01/2006 |
Two Carlisle ST trailer rated tires
|
$ 162.73 |
| 07/01/2006 |
Short neck bulbs for stop/tail lights
|
$1.74 |
| 07/01/2006 |
License Plate light
|
$ 3.97 |
| 07/01/2006 |
Fire Extinguisher
|
$ 9.44 |
| 07/01/2006 |
Paper Towel holder
|
$ 1.94 |
| 07/01/2006 |
Wheel Chocks
|
$ 9.98 |
| 07/03/2006 |
Caster wheel for front nose jack
|
$ 25.00 |
| 07/09/2006 |
2" ball valve
|
$ 40.00 |
| 07/10/2006 |
Oven thermometer/digital thermometer
|
$ 24.95 |
Some of my Favorite prep links:
|