|
UPDATE AUGUST 15, 2005
This trailer has now been reported STOLEN
with Travis County. On Sunday, 08/14/2005, thieves cut a lock and chain,
entered private property and stole this bbq trailer leaving no trace
evidence. I have posted details on several forums. If you see this
pit, contact me via email ASAP.
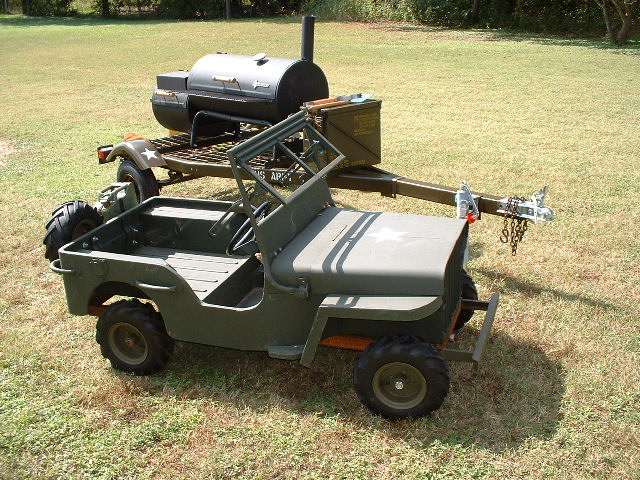
Well, if you've read the General Mess section, you would have to agree the
little M416 was just TOO nice to cut a tailgate in for that bbq pit
project. So, "Major Mike" purchased the M416 and will give it
a nice home in a garage and he promised to not modify it from original
condition. In fact, he might even join the MVPA as he now owns a bit of
military history!
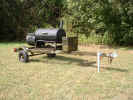
I decided to continue my quest for a mobile bbq pit. Having been
'busted' in rank, I decided to call this attempt "Private Mess". I basically
have taken the approach that cheap is good for now. I figured if I could
secure a cheap trailer, clean it up, paint it OD and mount the pit, that would
meet my immediate needs. I can always upgrade later!
09/18/04 (Sat)
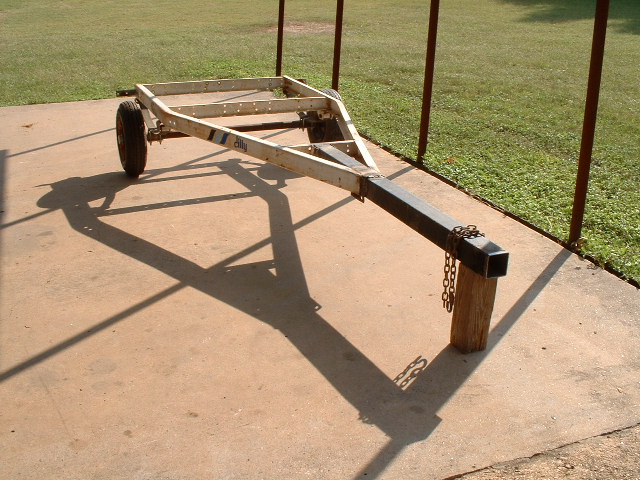
With that in mind, I secured an older (and I mean older) Dilly boat trailer that had a good frame,
axle and tires, but no tongue. I also picked up two other boat trailers in
various states of disrepair. Total cost of all three trailers - nada/zip/nill.
I stripped the little trailers of all their parts, fenders, wiring and lights.
09/19/04 (Sun)
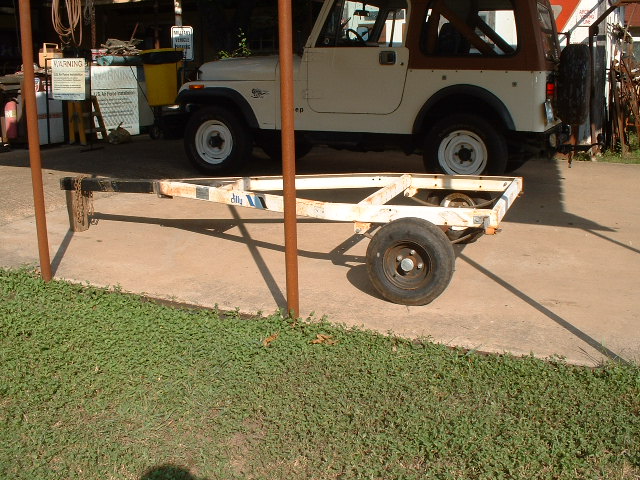
I welded a four foot section of 3" square tubing for the tongue from
one of the other trailers. The other two have now gone the way of the
scrap heap and Private Mess is beginning to taking shape.
 |
 |
 |
|
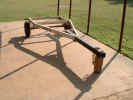
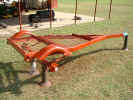
Here's the little
Dilly, all bare and ready to go! |
|
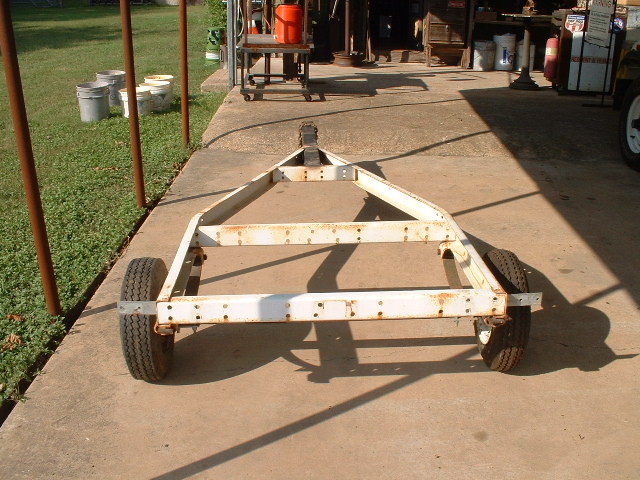
09/26/04 (Sun)
Today was welding and sanding. I welded on the 2" ball coupler
and hand/machine sanded just about every part I could get to. I had
planned on priming the trailer, but I ran out of the PPG 2 part red oxide primer
priming a friends trailer. Now Herb got a deal out of this one.... He
sanded his trailer and I got to prime it. I even get the privilege of
painting it for him later next week. (oh heck - he's a good guy and #33070
will be a great color for it...)
 |
 |
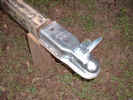
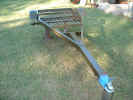
| The new 2"
ball coupler |
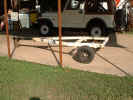
Herb's 18'
trailer in the PPG primer |
09/27/04 (Mon)
Today was a 'freebie' day. I secured two pieces of grocery store shelving
rack about 34"x72" with 3" squares. It kind of looks like
fence panels. I also scored a 10' stick of 1-1/2" angle iron.
The plan is to use the store shelving as the base of the trailer to hold the
wood and supplies in. This saves me on purchasing expanded metal!
The angle iron will make up the base frame and uprights.
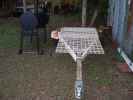 |
| Some of the metal... |
09/28/04 (Tue)
Today was the purchase of the catalyst primer. There was a little bit of a
mix-up when Herb (18' trailer above) purchased the original primer for
General Mess. They only gave him 2 of the 3 cans he was supposed to
receive. So....I told the paint dealer what happened and they gladly gave me the
missing can. I also purchased a New Braunfels "Hondo Original"
smoker/bbq pit for the project. I had taken the approach of doing this as
CHEAP as possible, but I couldn't bring myself to put a cheapo 55 gal drum type pit on the back of
it!
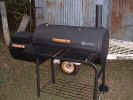 |
| The new pit... |
09/29/04 (Wed)
No work on the little BBQ pit trailer. We did however finish painting Herb's 18'
trailer in a Late WWII OD #33070. Turned out pretty nice. OK, really
nice. All that remains is scuffing up the white rims and shooting them OD
and while the tires/rims are off, do the same for the inside fender wells.
That and a set of stars and bars will be great!
 |
| Herb's
"newly painted" 18' trailer... |
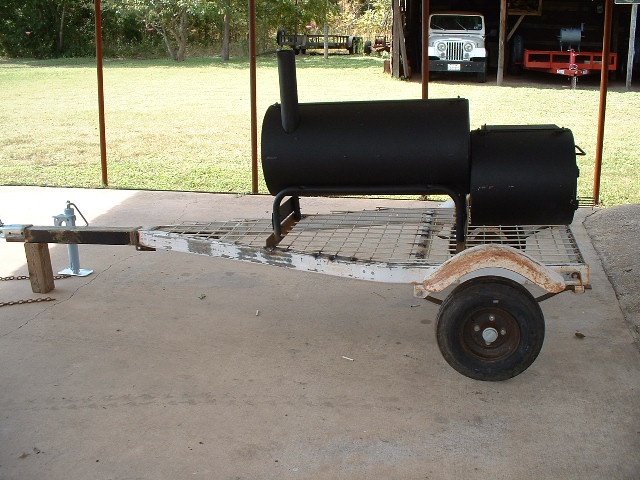
10/10/04 (Sun)
Today was a fantastic day. Temps in the mid/upper 80's, low humidity and a
bit of a North breeze to clean out all the junk in the air. With that, I
got straight to work on measuring where to cut the legs off of the pit and
figured out how to mount it to the trailer frame. I cut some angle and cut
the display rack material for a good fit. I then tacked the front angle on
and put the pit in place to drill the leg holes. I unassembled the whole
thing, then welded the angle and display rack to the frame. Next up was a
cleaning and a good primer coat with my favorite PPG 2 part red oxide primer
followed by 3 coats of #24087. I'll let this cure for a few days while I
sand the rims and shoot them OD.
 |
 |
 |
 |
 |
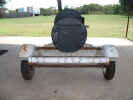
| The pit cut to size and
mounted |
Rear/firebox view |
Primered and ready to go |
Three coats of #24087 |
Green or Brown? #24087
seems to change in the light... |
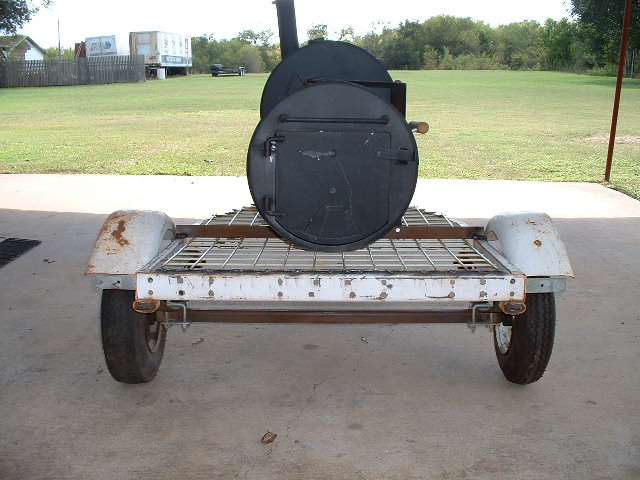
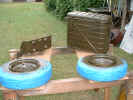
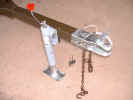
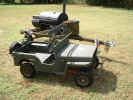
10/16/04 (Sat)
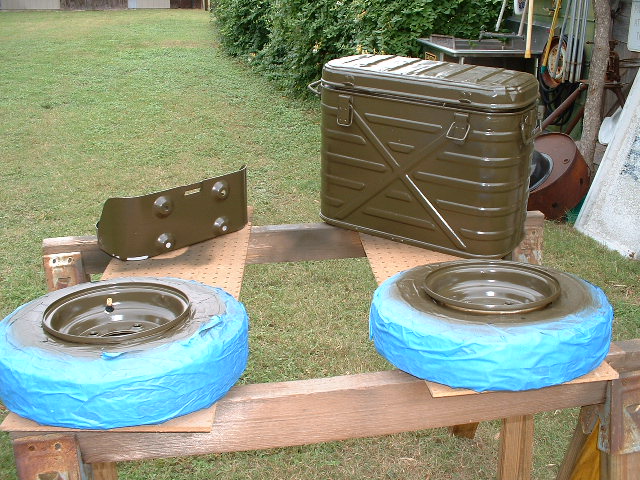
Today was GREAT progress! I started by letting out the air of the new
tire/wheel combinations and hand sanding the front and back sides, then taping
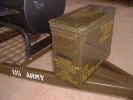
the tires up to avoid over-spray. I then washed a mermite can, jerry can
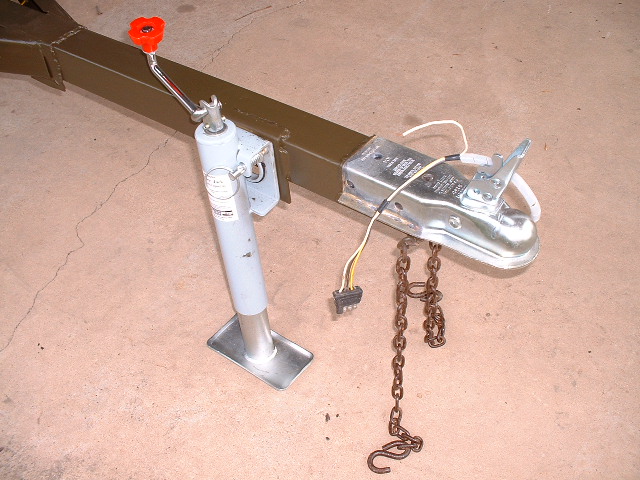
bracket and 20mm ammo can and set them up on some saw-horses ready to be spray-painted. Next up was the welding of the landing leg and sanding down the
paint that was burned off in the weld process. I then welded the safety
chains in place. Still waiting for the temperatures to warm up, I
installed the wire harness and lights and got them working perfectly. Next
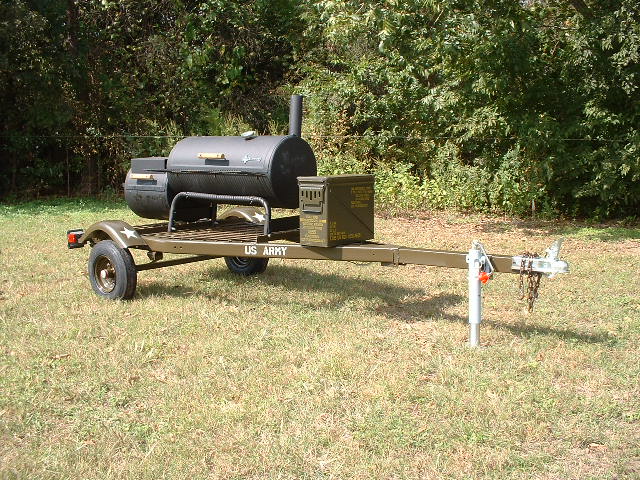
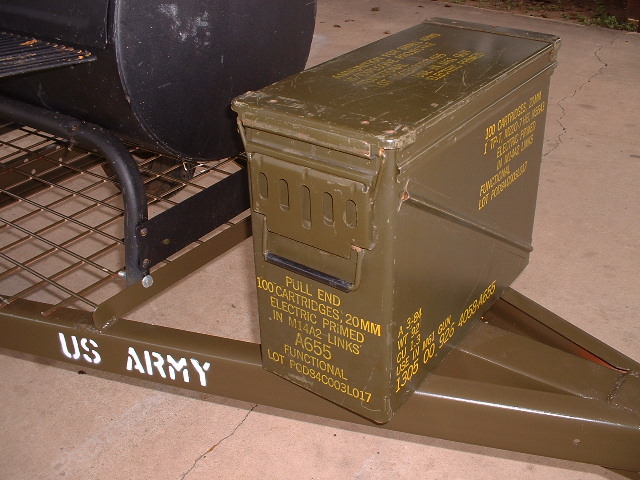
was the installation of the ammo can on the nose. I decided I liked the
markings on it so it wasn't painted. Finally, I got around to applying the
stencils of US ARMY on each side, a star on each fender well and 45BDEX and 145G
on the back end. (same as the jeep). The sun was finally
up, it was warm (mid-80's) and I painted the tongue where the landing leg was
welded, the new wheels, jerry can bracket, mermite can and a few other things we
use around "Kaiserville". At this point, I don't
think I'm going to add the jerry can with a water can/spigot or the mermite can. They seem to 'junk' it up a bit and it's crowded at best.
 |
 |
 |
 |
 |
| Fresh paint on the new rims
and other parts |
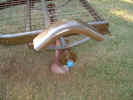
Welded landing leg and
chains |
Mounted 20mm ammo box for
cooking utensils |
Almost done! Swap
tire/rims set and repack the wheel bearings is all that's left... |
The back end... |
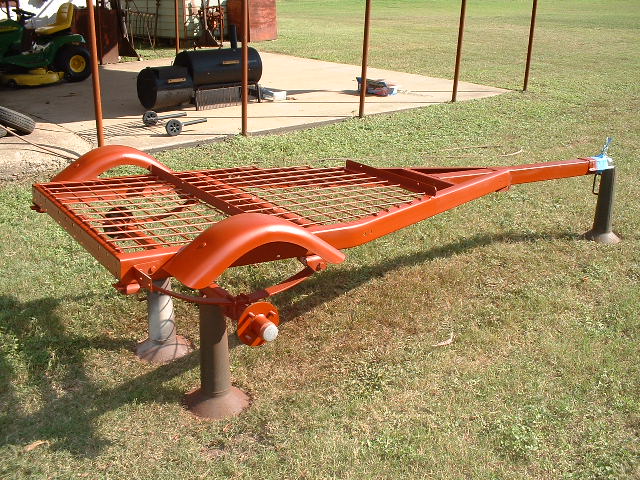
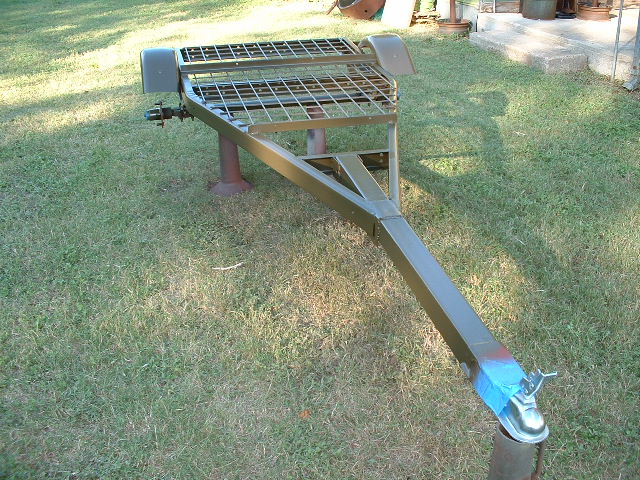
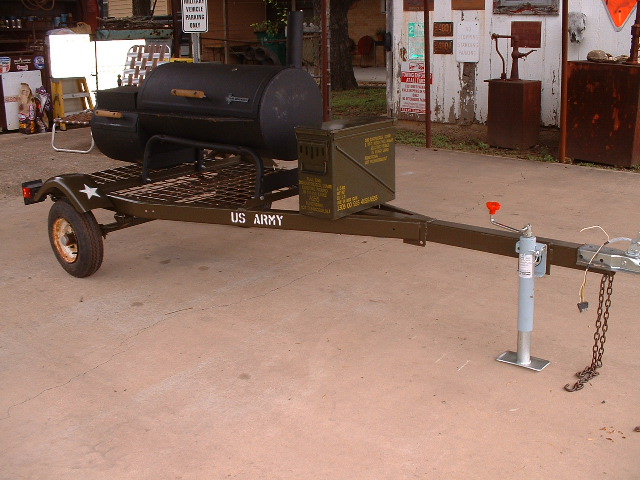
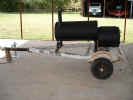
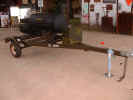
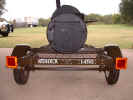
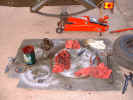
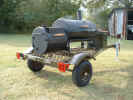
10/17/04 (Sun)
Right on schedule. Finished Pvt. Mess today one month after securing the
basic parts! First thing was to
clean out all the old grease and repack the wheel bearings. The bearings
were in great shape but the grease had outlived lived it useful life. With
new wheel grease and the hubs greased beautifully, the freshly painted tire/rim
combinations were installed. After a few pictures, it was time to christen
the Pvt. Mess!
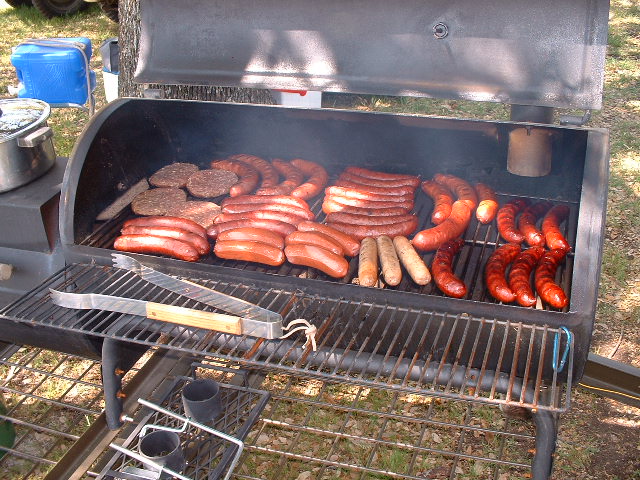
Starting about noon, I sprayed the inside with PAM cooking spray. I
fired up the coal box with a mix of Kingsford mesquite charcoal, hickory and
pecan and let that smoke for two hours to season the inside. At 2pm, we tossed on some
Johnsonville Brats and let them smoke for an hour and had sausage wraps about
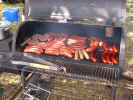
3pm. I prepped the ribs, stoked the fire and started them about
3:30pm. At 6pm (2-1/2 hours later) the ribs came off and were pretty darn
good. Not bad for the "first cook" or six hours seasoning time
on the old pit...
 |
 |
 |
 |
 |
| Left side wheel bearing
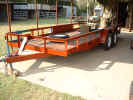
cleaning and repack... |
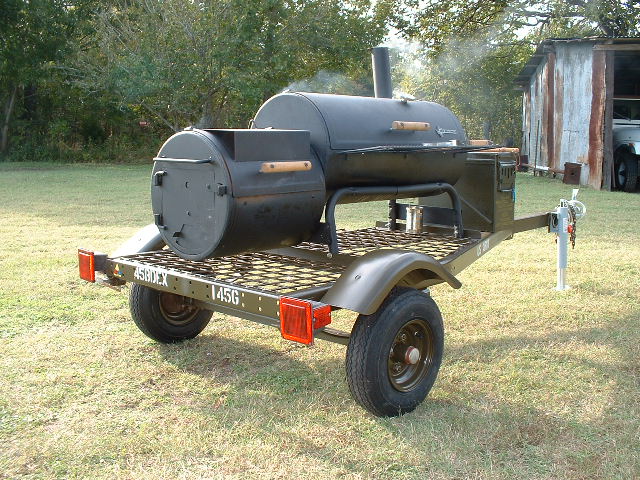
Finished! |
Added an MVPA sticker and
fired it up |
The next project - finish
the Mini-MB |
Rack of pork ribs. Mix
of Pecan and Hickory smoked for 2-1/2 hours. |
|
|
 |
|
|
|
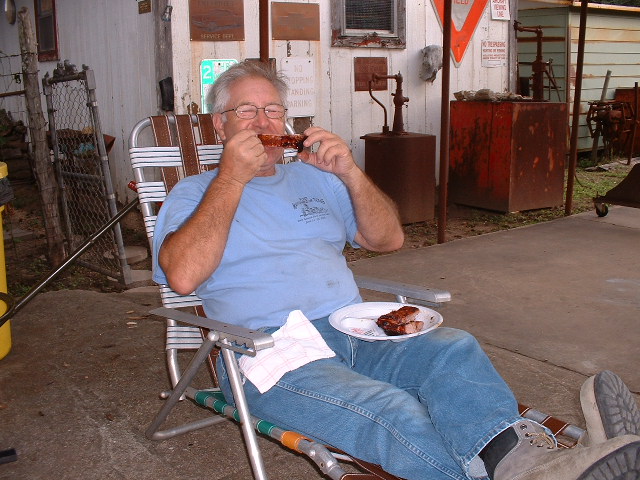
|
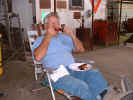
One happy father-in-law... |
|
|
Now that the pit is done, I figured I saved about $1,700 going this route and
the end result is the same. I've got a trailered bbq pit that we can all
have some fun with. Now if I could just get motivated to finish the Mini-MB. LOL...
Costs to Date: (including tax)
| 09/20/2004 |
2" ball coupler (Magnum
Custom Trailers) |
$16.57 |
| 09/28/2004 |
PPG primer catalyst (Local PPG
dealer) |
$21.38 |
| 09/28/2004 |
Hondo Original smoker/bbq pit
(Academy Sporting) |
$149.02 |
| 09/30/2004 |
Landing Leg (Harbor Freight) |
$20.00 |
| 10/02/2004 |
Two 4.80x8 tire/rim combinations
(Wal-Mart) |
$51.90 |
| 10/16/2004 |
Spare Tire mount (Academy Sporting
) |
$4.15 |
|
|
|
|
Project expenses to date: |
$263.02 |
In Yummary, er.....Summary
 |
 |
 |
 |
 |
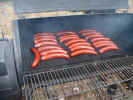
Pork Ribs
'04 Kaiserville |
12lb Turkey
'04 Thanksgiving |
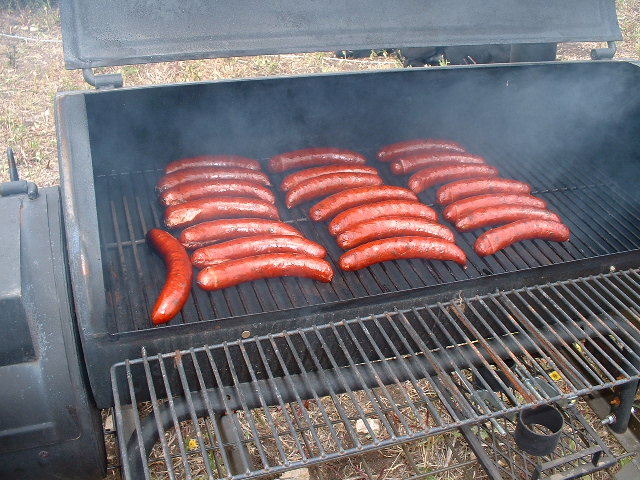
Sausages
Venison, Elk, Buffalo
'05 Burnet Air Show |
Sausages
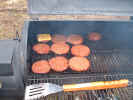
'05 Temple Air Show |
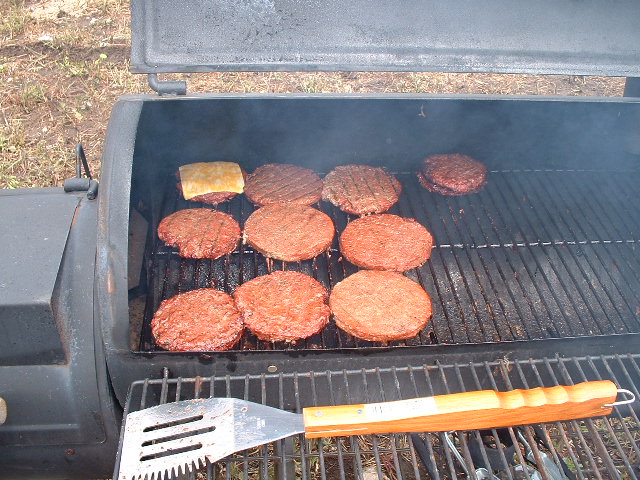
Burgers
'05 Temple Air Show |
 |
|
|
|
|
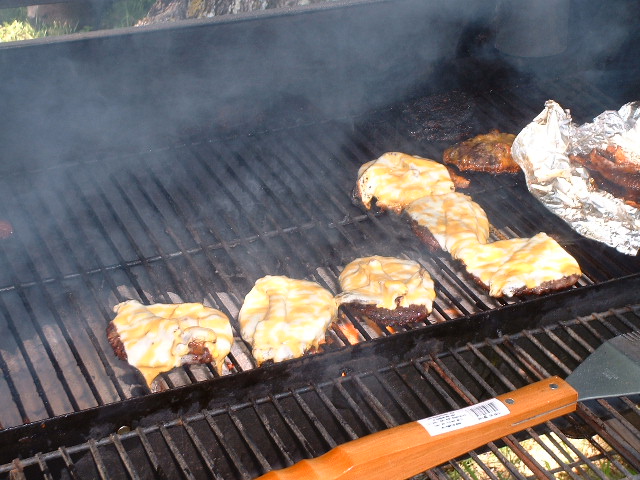
| Bacon cheeseburgers |
|
|
|
|
Parts Sources:
Brent Mullins with Brent
Mullins Jeep Parts - #24087 paint
|